Successfully pass the free certification exam at IW Academy and become an Infinet Certified Engineer.
The "Maintenance" menu allows you to perform service tasks for the device maintenance and to check the hardware and software version, reason for the last reboot, system uptime, current configuration, license, diagnostic card, etc.
"Maintenance" page has the following sections:
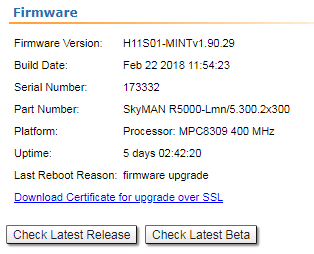
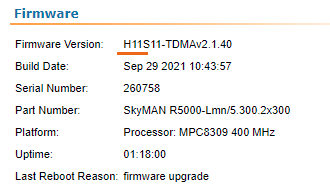
Firmware
| Parameter | Description |
|---|---|
Firmware Version |
|
Build Date |
|
Serial Number |
|
Part Number |
|
Platform |
|
Uptime |
|
Last Reboot Reason |
|
SSL certificate installation
NOTE
To configure a wireless device via Web GUI using secure protocol HTTPS, a SSL certificate must be installed as trusted into your web browser. Otherwise, the automatic update function will not be available.
The following description shows an installation process for Google Chrome web browser. Configuration of other web browsers is described in the relevant product user guide and is similar to following.
- Download SSL certificate by clicking the "Install Certificate for upgrade firmware via SSL" link. Please note, this link is available if you connect to the Web GUI via HTTPS only.
Open the "Chrome Settings" section and click on the "Manage certificates" button.
Figure – Google Chrome SettingsClick the "Import..." button to launch Certificate Import Wizard.
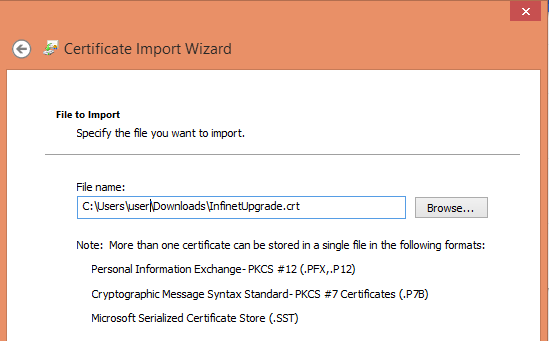
Follow the wizard's instructions and choose the file to be imported. Click the "Browse..." button and choose the SSL certificate that you have downloaded before. Click the "Next" button to proceed.
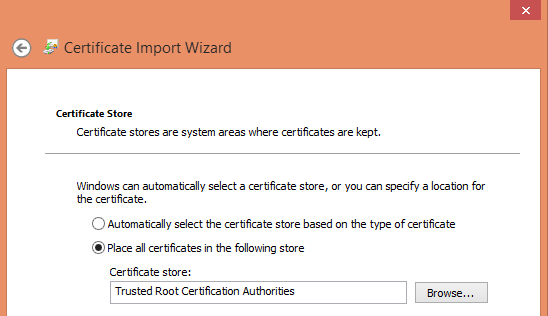
Figure – Certificate Import WizardIn the next step it is necessary to select the repository where certificate will be placed. All new certificates are installed into the personal repository by default, click on the "Browse..." button and select "Trusted Root Certification Authorities". Click the "Next" button to proceed.
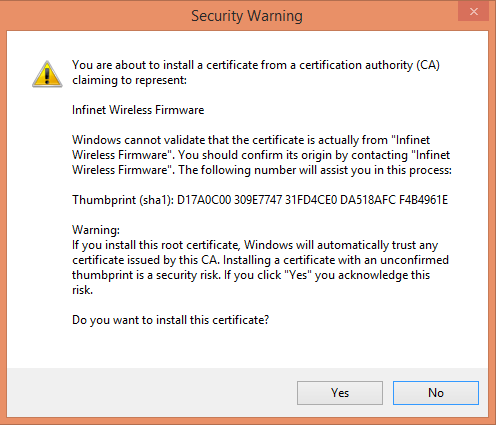
Figure – Certificates store selectionFinal step is to check all the provided information. Click the "Finish" button if it's correct. The security warning will appear, click the "Yes" button to confirm you really want to install the certificate.
Figure – Installation confirmation
Firmware update
The firmware can be updated in two ways: automatically and manually.
Automatic update
The system checks automatically for the firmware updates on the Infinet Wireless repository and displays a warning message for 10s at each login to the Web interface if a new software version is available:
NOTE
It is not mandatory for the unit to have access to the Internet for this feature to work. However, the PC that is used to initialize the upgrade procedure must have access to InfiNet Wireless website (both http and ftp).
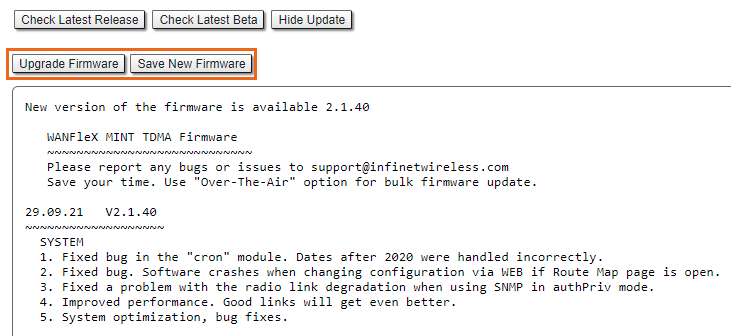
In case of new software version availability, after clicking the «Check Latest Release» button, the system provides the following options:
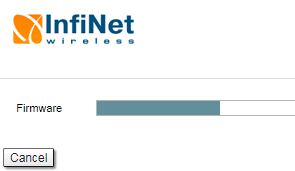
By clicking the «Upgrade Firmware» button, the system starts the firmware upgrade process automatically:
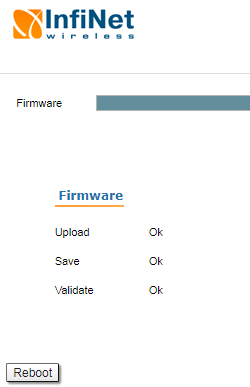
After the firmware upgrade process ends, you have to reboot the unit before using the new software version:
By clicking the «Save New Firmware» button, you download the new firmware file locally on your PC.
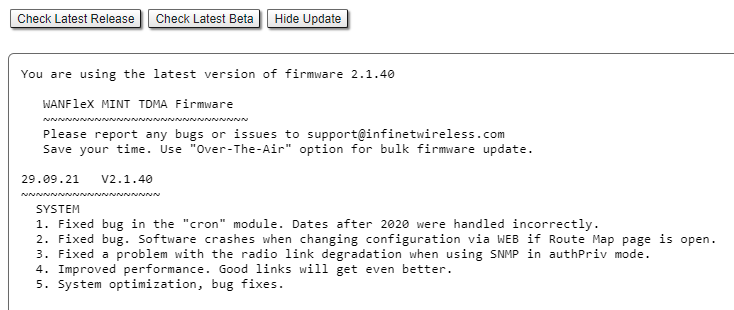
If no new firmware version is available, the system provides a full change log for the latest firmware release after clicking the «Check Latest Release» button:
The process above is the same in case of Beta firmware version. Click the «Check Latest Beta» button for it.
Manual update
In case the PC does not have an access to the Internet, the device must be updated manually. To do this, proceed to the following steps:
Download the required firmware version in advance from the official FTP server (https://ftp.infinet.ru).
Pay attention to the hardware platform of the device being updated, indicated in the Firmware section.
- Firmware with Polling technology support can be downloaded via the link: https://ftp.infinet.ru/pub/Firmware/MINT/
- Firmware with TDMA technology support can be downloaded via the link: https://ftp.infinet.ru/pub/Firmware/TDMA/
- Beta versions are available via the link: https://ftp.infinet.ru/pub/Firmware/beta/
- Choose the downloaded firmware file in the "Upload" section.
- Click the "Upload" button. The upgrade process will be started.
Mass firmware upgrade
Each device has the ability to mass firmware upgrade using OTA (Over the Air) function. The firmware can be distributed to:
- All devices within a single MINT domain. The firmware will be applied even to the not directly connected devices.
- Neighbor devices, directly connected to the current.
NOTE
Only one firmware version can be applied during one mass upgrade cycle. The uploaded firmware version will be applied only to those devices that are built on the same platform. Thus if the upgraded network includes devices on different platforms, the mass upgrade cycle should be performed for each platform.
In case the OTA function is enabled the uploaded firmware will not be applied to the device from which the upgrade is performed. It will be uploaded only to the other network devices.
NOTE
To prevent loss of a network availability, by default the upgrade from MINT to TDMA firmware versions using the OTA function is forbidden. In order to update a network over the air, enter the "mint rf5.0 -air -swmodel" command in the "Command Line" section of the device from which the network is updating. This command is valid for one firmware upgrade. In order to upgrade devices with different hardware platforms (for example, H11 and H08) or for the repeated uploading of the firmware version, the command will need to be entered again after the first upgrade is completed.
Mass upgrade cycle includes the following steps:
- Download the required firmware version from the official FTP server (https://ftp.infinet.ru).
Choose the downloaded firmware file in the "Upload" section. Enable OTA function. Enable "Neighbors only" in case you want to upgrade only the neighbor devices.
- Click the "Upload" button. The mass upgrade process will be started.
Mass upgrade monitoring
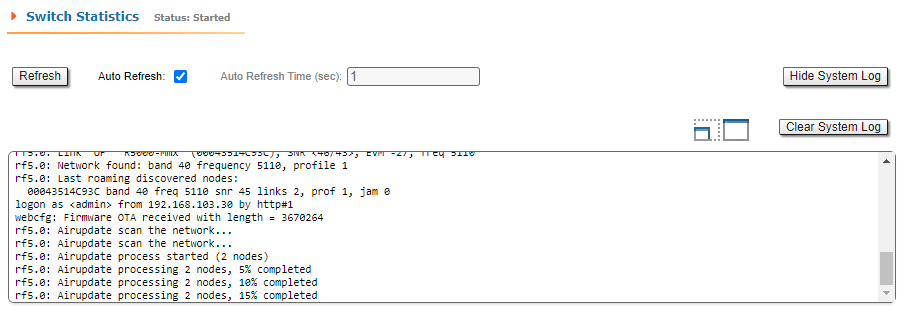
The mass upgrade progress can be seen in the System Log (Device Status section): the number of upgraded devices and progress.
The remote devices will be rebooted after upgrade completion. The connection failure duration is approximately 35-40 seconds per device.
Upload
The "Upload" section allows you to upload other license, firmware and configuration files to the unit.
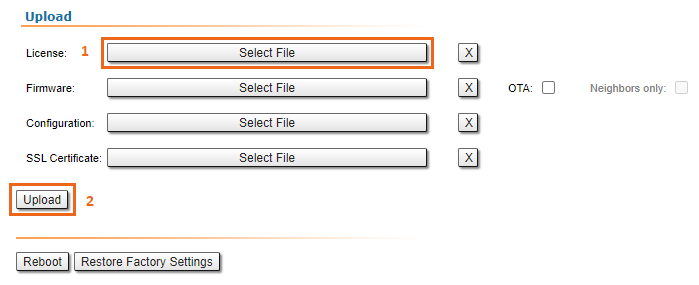
For each of the three options, click the «Select File» button, followed by the «Upload» button after the file has been picked up.
After clicking the «Upload» button, the system performs three operations: uploading, saving and validating the new file uploaded and indicates if each of the operation succeeded or failed. In case that the process succeeded, you have to reboot the unit in order to apply the new changes.
For example, to upload the license click on the «Select File» button (1), choose appropriate file on your computer, then click the «Upload» button (2) as it is shown on the figure below.
Download
The "Download" section allows you to download locally, to the management PC, the current license, firmware and configuration files, by clicking the corresponding buttons: «Download License», «Download Firmware» and «Download Configuration».
Bottom section of the page
The following buttons are available:
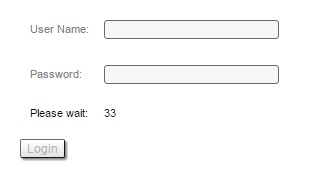
- «Reboot» - reboots the device. A warning message pops up asking for the permission before the operation to start. During the restart process, you are redirected to the login page and the timeout period of 35 seconds counts down before the new login:
- «Restore Factory Settings» - restores the factory default configuration. A warning message pops up, asking for the permission before the operation to start. During the reset to factory process, you are redirected to the login page and the timeout period of 30 seconds counts down before the new login:
- «View Current License» - shows the current device license parameters in a new window
- «View Current Configuration» - shows the current device configuration in text format in a new window
- «Create Diagnostic Card» - Tech Support Reports Generator. By clicking this button, the system downloads to the local PC a text file that contains the complete information (for the technical support specialists) set from the device such as: full device configuration listing, system log output, license information, “mint map detail” command output, interfaces statistics, etc.
