Successfully pass the free certification exam at IW Academy and become an Infinet Certified Engineer.
InfiMONITOR polles devices via the SNMP protocol. Therefore each device in the network should have SNMP agent running and configured to perform the devices management and monitoring.
How to add new device to monitoring network
By default, "SNMP Agent" and "SNMP Trap" are disabled.
Make necessary changes to the device configuration to perform monitoring with InfiMONITOR: enable "SNMP Agent" and configure the "SNMP Trap" parameters.
There are two ways:
- Via the CLI command line interface (this option is faster)
- Via the WANFleX web-interface.
Via the CLI
Access the device via the Telnet or SSH protocols and execute the following commands (replace USERNAME and PASSWORD with the desired values):
snmpd user USERNAME add pass PASSWORD security authNoPriv accessRights readWrite class admin
NOTE
Only protected mode "authNoPriv" is supported by InfiMONITOR
Start "SNMP Agent" and save the configuration
snmpd start
config save
In order to start and configure "SNMP Agent" simultaneously for all CPEs connected to the BS (including BS too), on the BS execute the following commands
mint rf5.0 rcmd -all -self "snmpd user USERNAME add pass PASSWORD security authNoPriv accessRights readWrite class admin"
mint rf5.0 rcmd -all -self "snmpd start"
mint rf5.0 rcmd -all -self "config save"
In order to enable "SNMP Trap" simultaneously for all CPE s connected to the BS (including BS too), on the BS execute the following commands (replace "IP ADDRESS" with the InfiMONITOR IP-address)
mint rf5.0 rcmd -all -self "trapd start"
mint rf5.0 rcmd -all -self "trapd dst IP ADDRESS:162/v2"
mint rf5.0 rcmd -all -self "trapd type topoGroup enable"
mint rf5.0 rcmd -all -self "trapd type radioGroup enable"
mint rf5.0 rcmd -all -self "trapd type mintGroup enable"
mint rf5.0 rcmd -all -self "trapd type ospfGroup enable"
mint rf5.0 rcmd -all -self "trapd type linkEvent enable"
mint rf5.0 rcmd -all -self "trapd typetrapdColdStartEvent enable"
mint rf5.0 rcmd -all -self "trapd type snmpdAuthenticationFailureEvent enable"
mint rf5.0 rcmd -all -self "trapd type syslog enable"
mint rf5.0 rcmd -all -self "config save"
Configure the agent IP-address separately, for each device (replace"IP ADDRESS" with the device IP-address value)
trapd agent IP ADDRESS
config save
Via the web-interface
NOTE
You can use the Web-interface "Command Line" section for running the commands mentioned above.
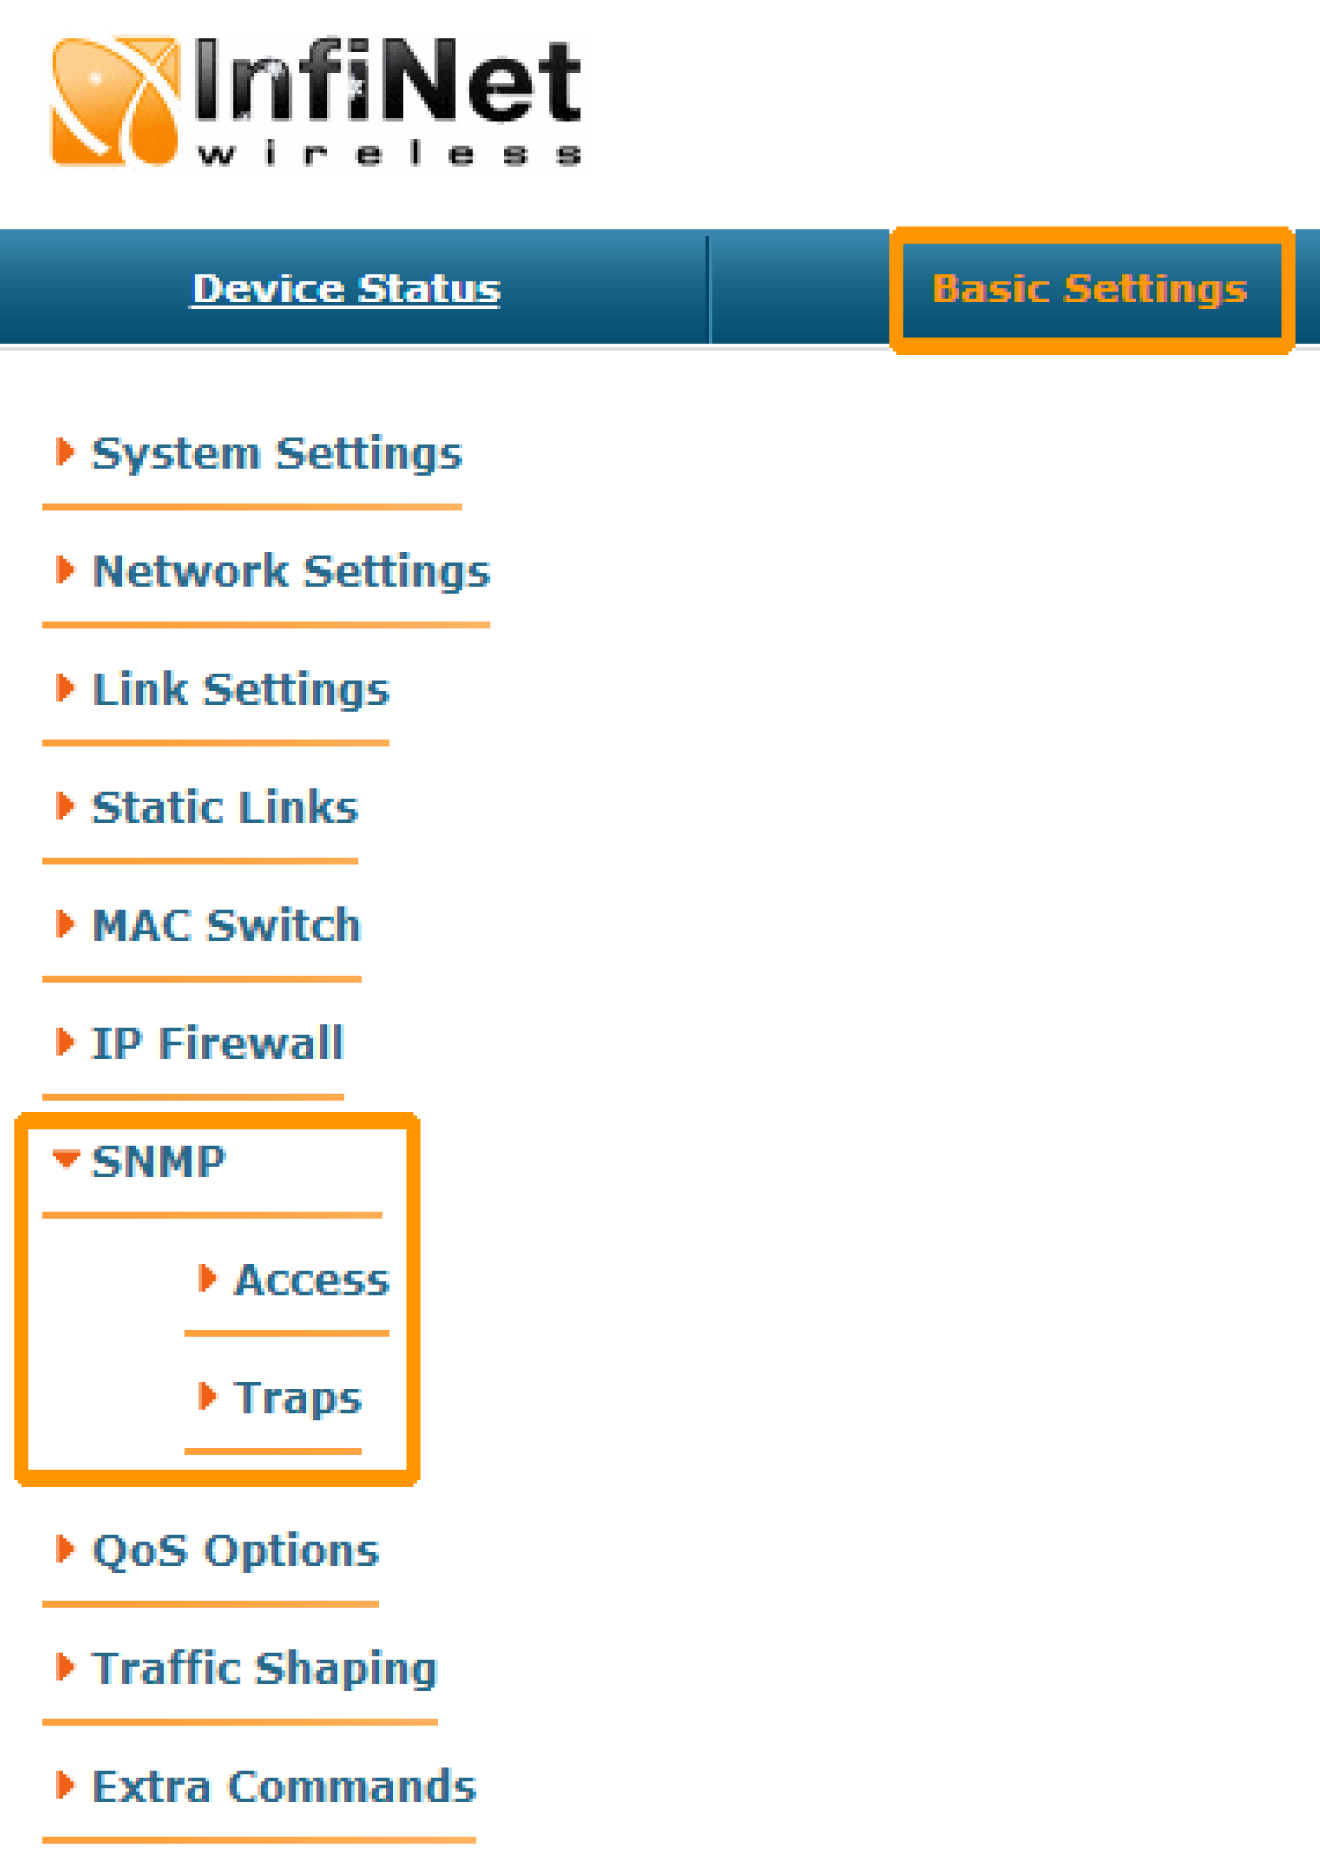
Login to the device via Web-interface. Go to the "Basic Setting" page and then to the "SNMP" menu. Click the "Access" option
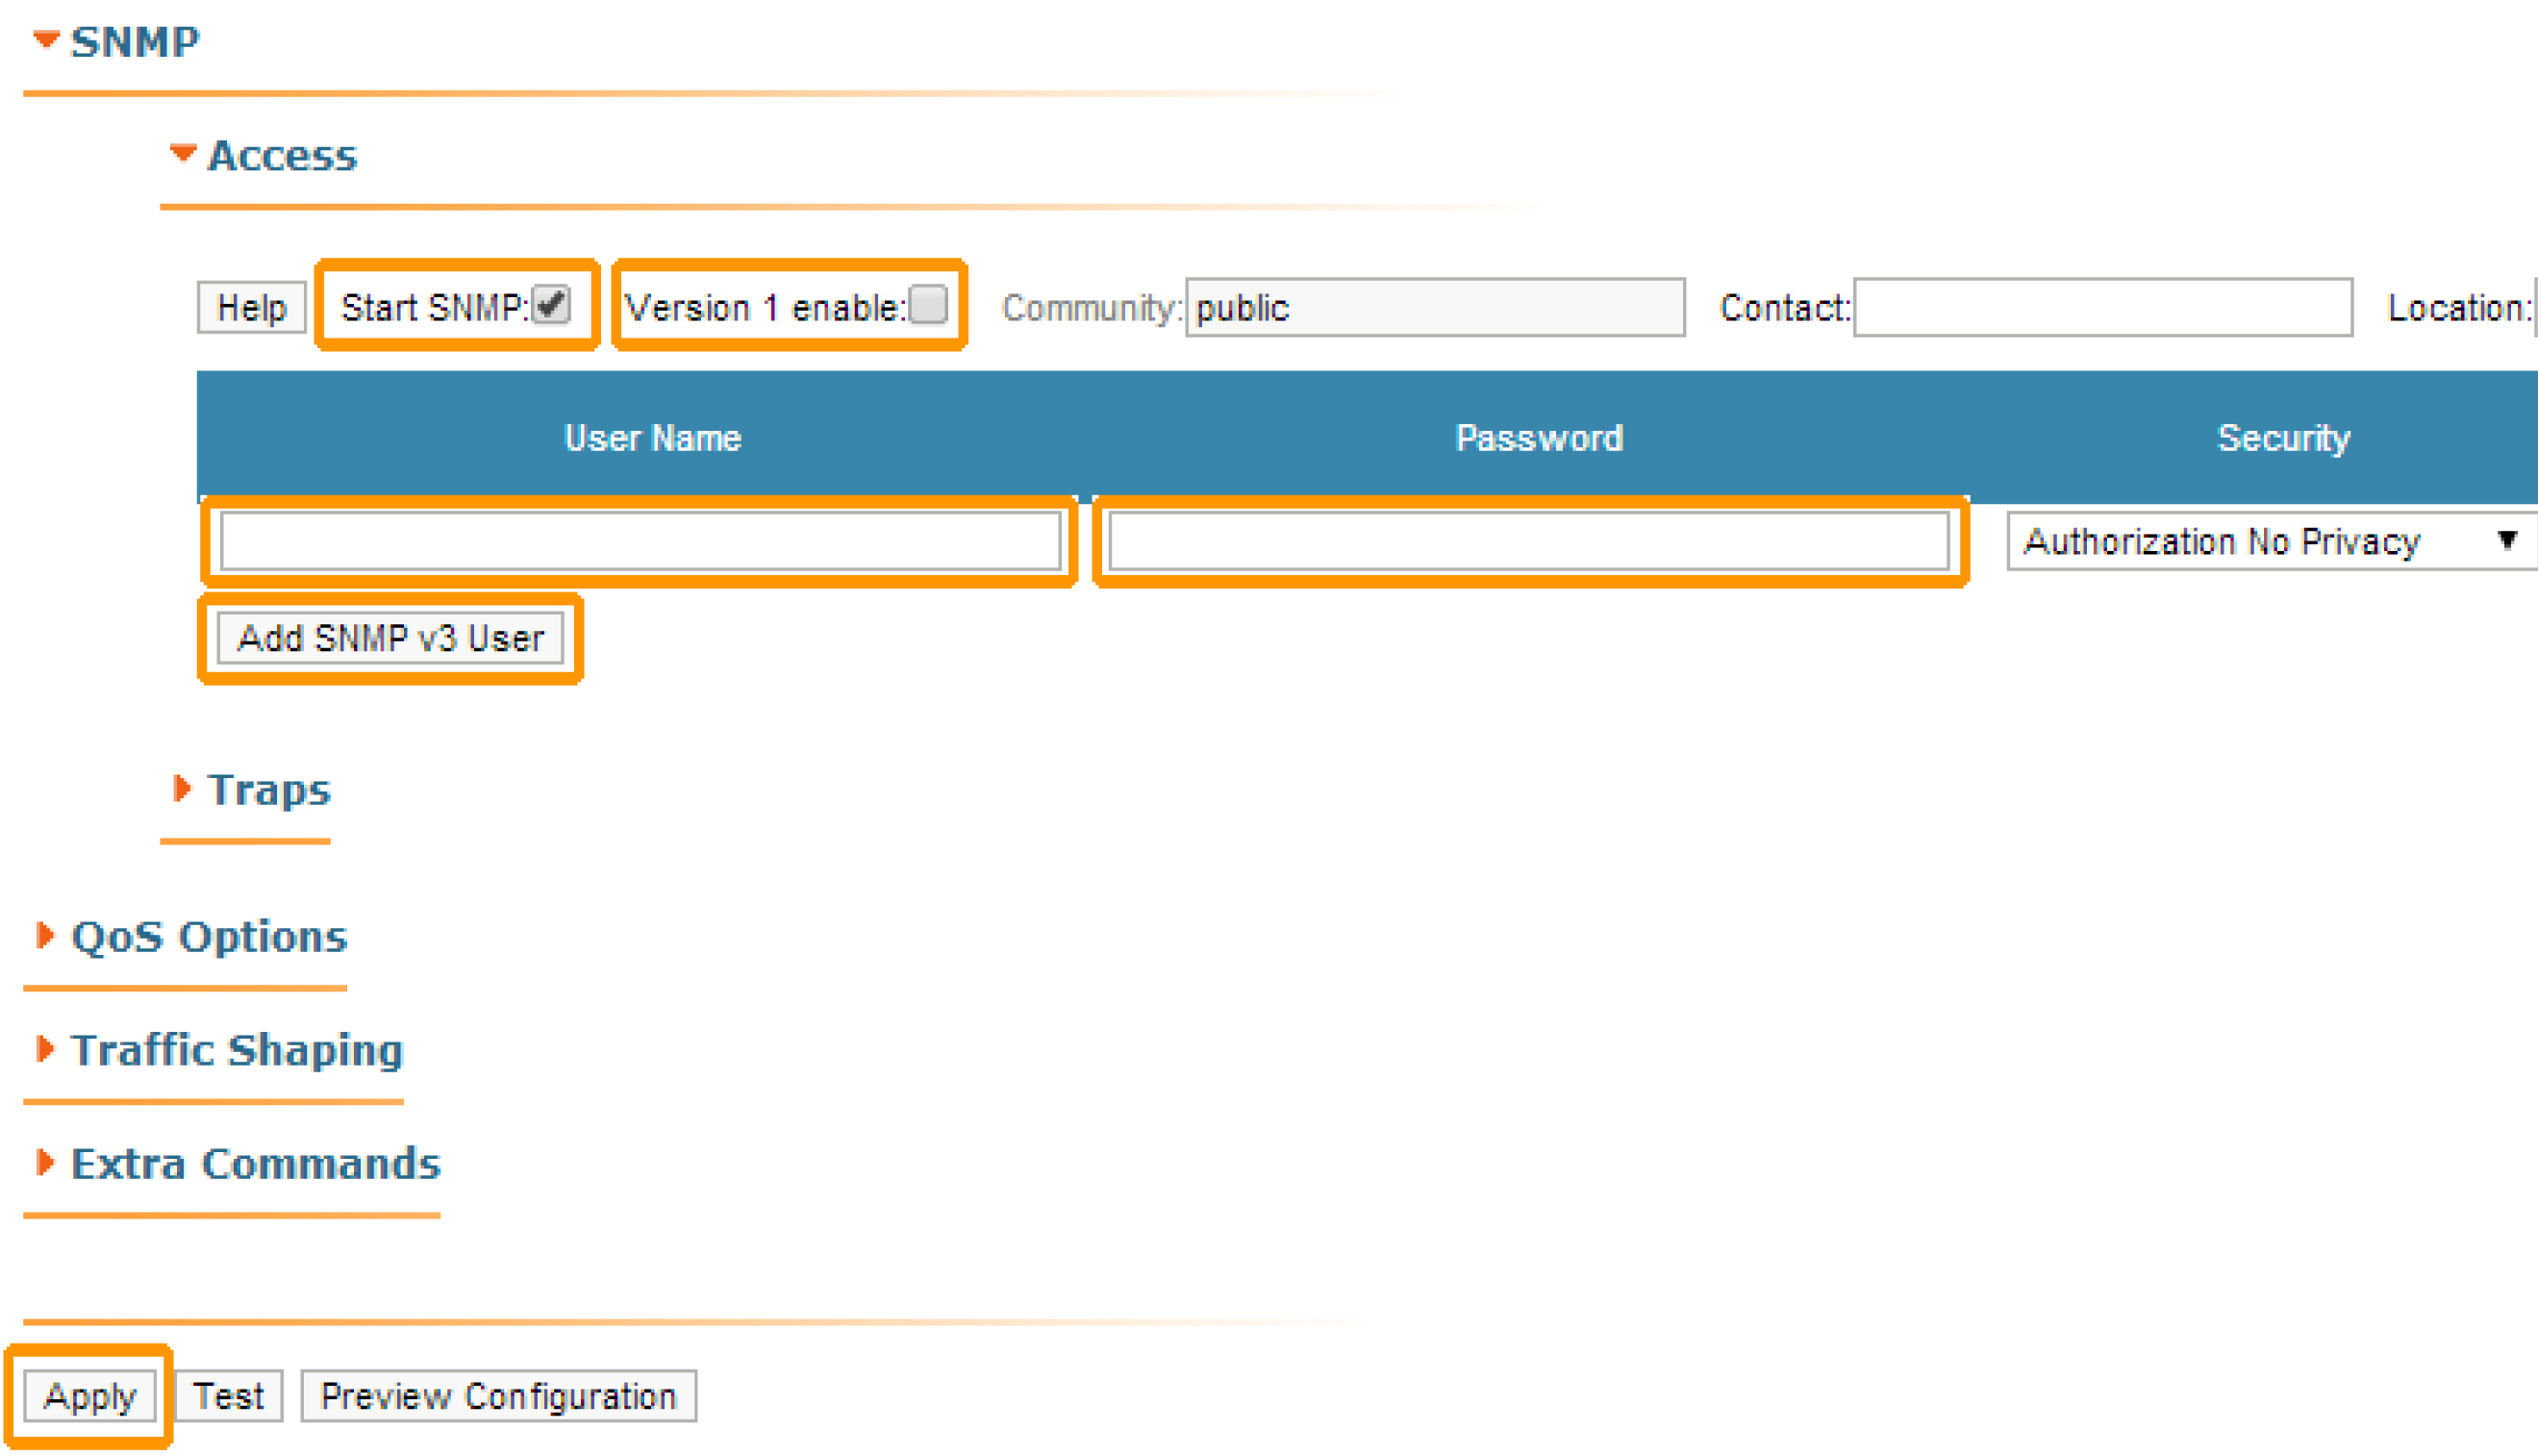
Select the “Start SNMP” checkbox (in order to enable "SNMP Agent") and unselect the “Version 1 enable” checkbox (in order to disable the SNMPv1 version, which is enabled in the default configuration). Click the «Add SNMPv3 User» button and insert the authentication data to access the device via the SNMP protocol into the “User Name” and “Password” fields. Leave the rest of the parameters intact:
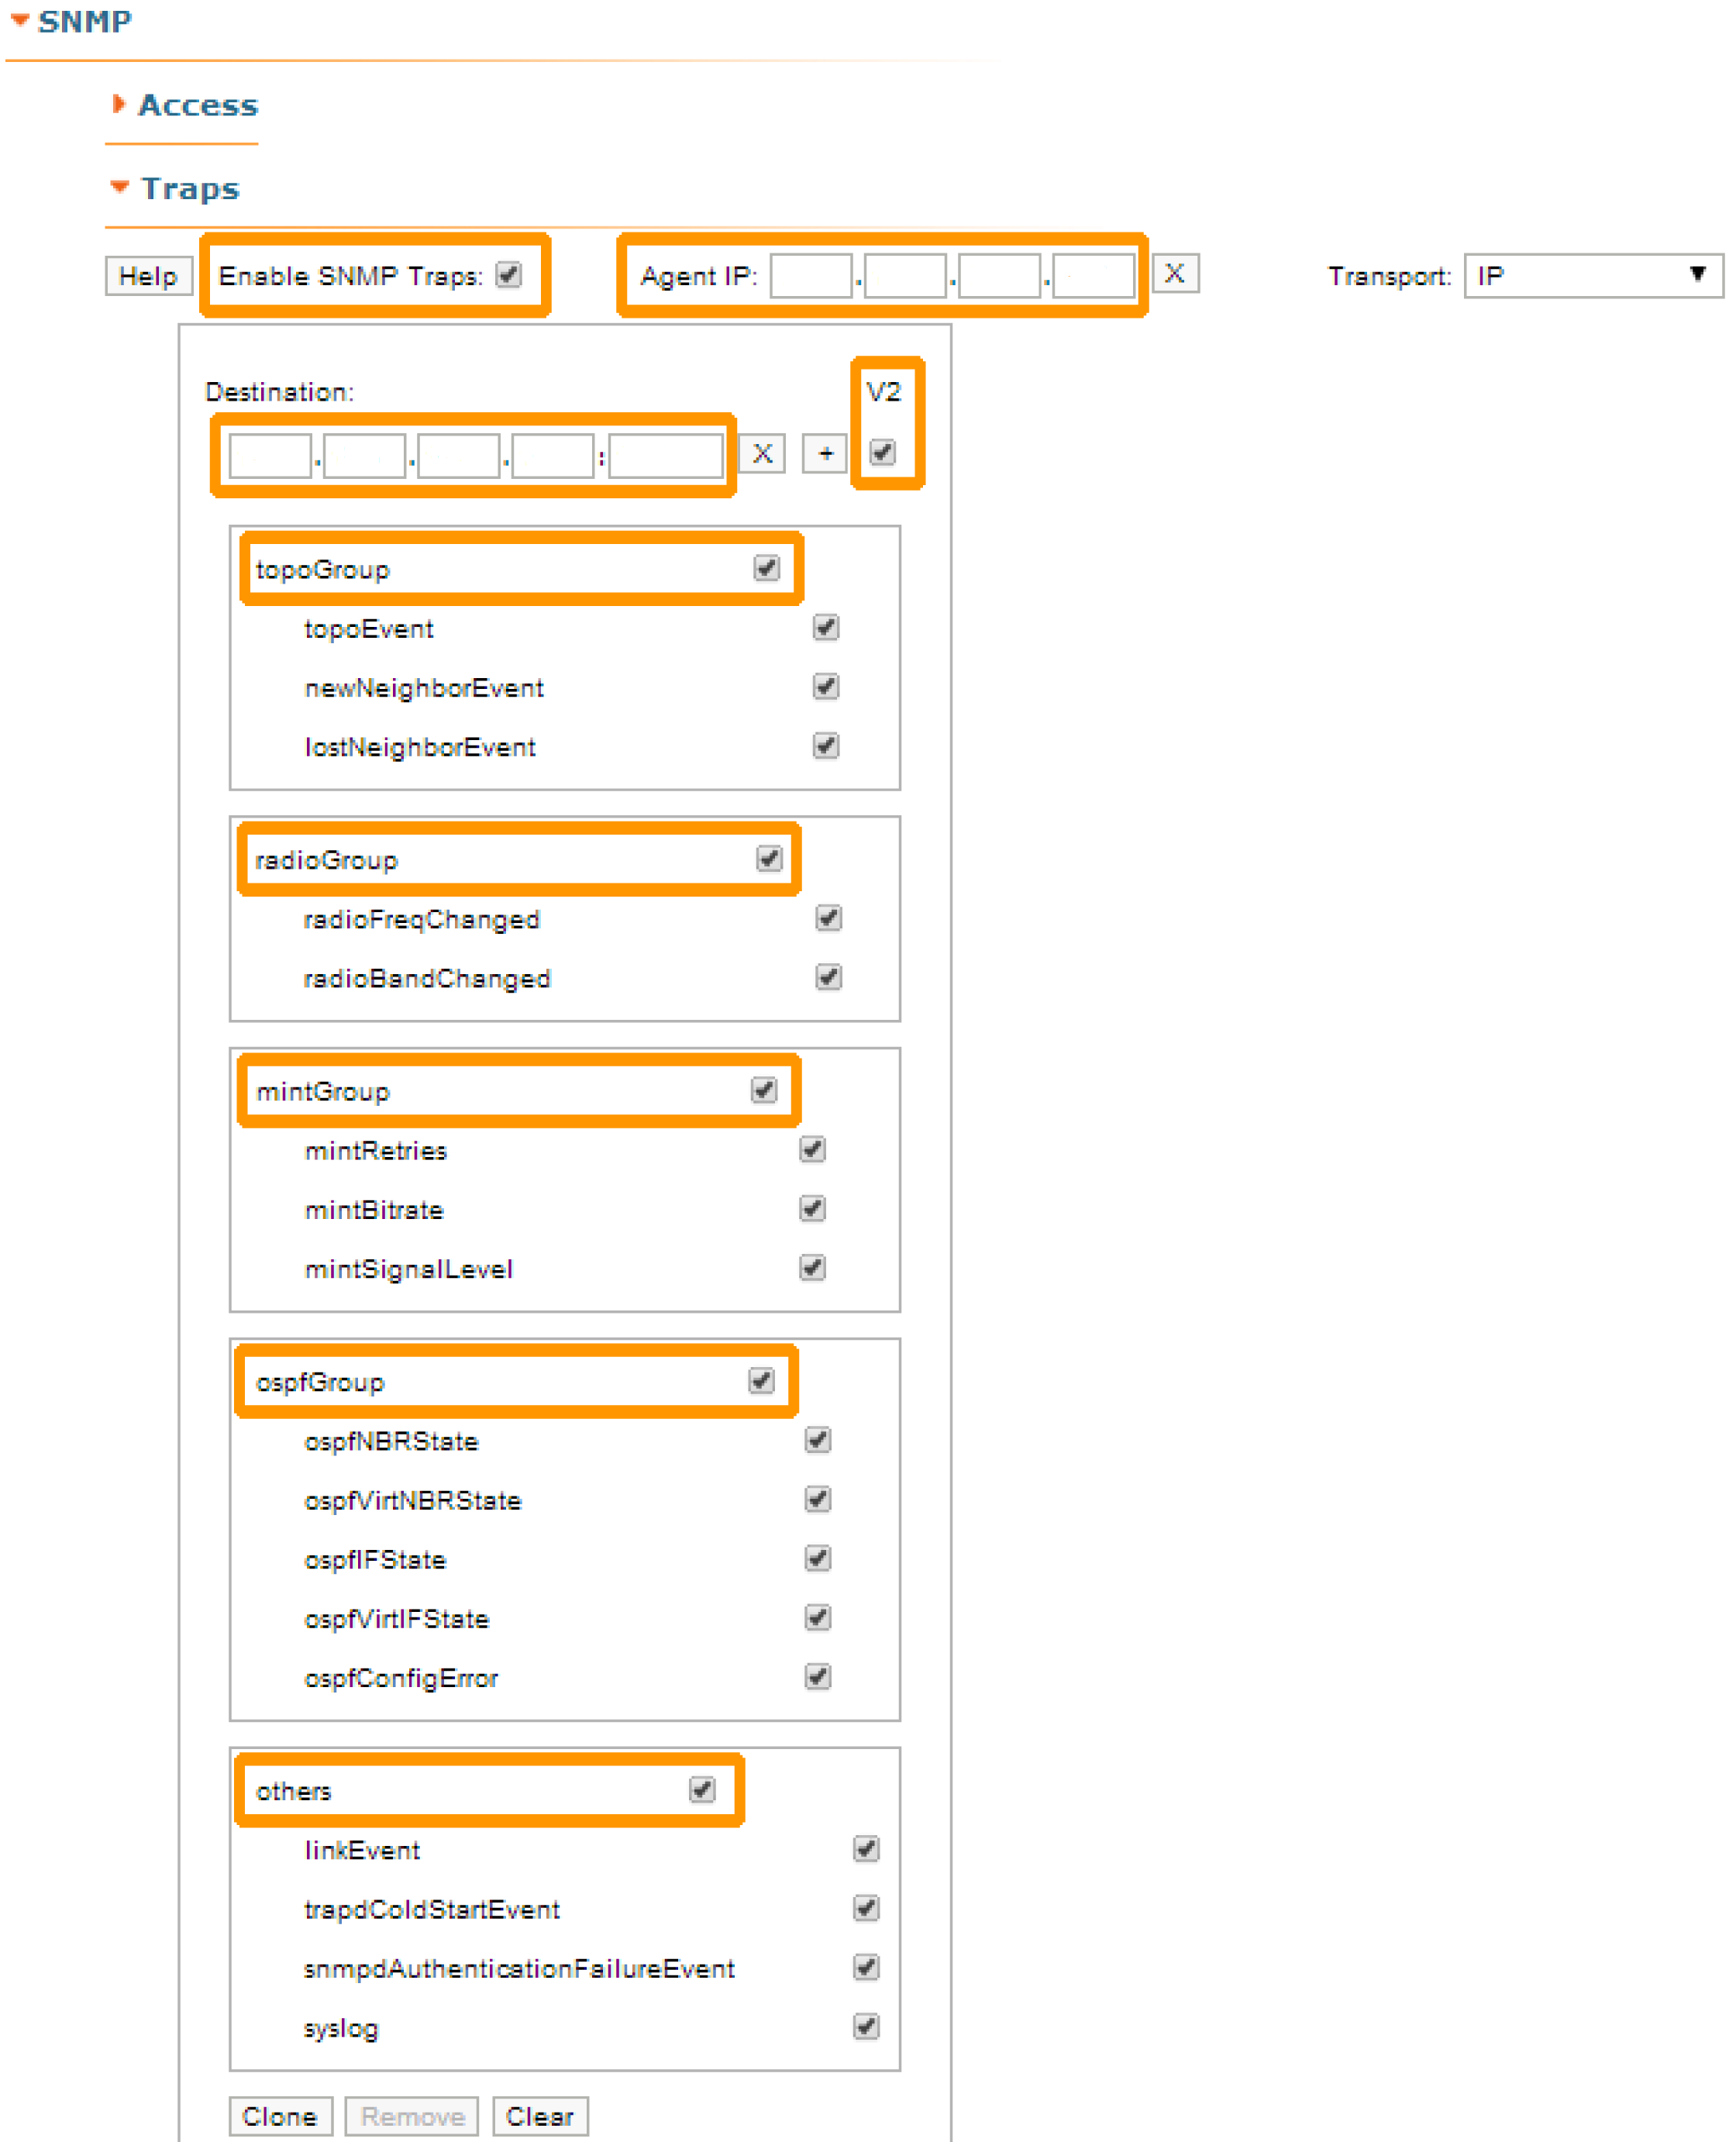
Click the “Traps” option in the "SNMP" menu, where are following fields:
- "Enable SNMP traps" - traps enable/disable, select the checkbox
- "Agent IP" - set the device IP-address
- "Destination" - the InfiMONITOR IP-address and UDP-port, which the "SNMP Trap" processing subsystem use for reception by default 162:
Finalize the configuration, click the "Apply" button.