Successfully pass the free certification exam at IW Academy and become an Infinet Certified Engineer.
The following configuration can be performed in order to customize the VLAN-based switching operation of the unit:
Switch default configuration works as transparent Layer 2 bridge. Therefore, by default any frames with any VLAN tags and untagged frames too will flow freely through wireless link.
VLAN Management
It is possible to add VLAN management configuration and to keep transparent Layer 2 bridging operational.
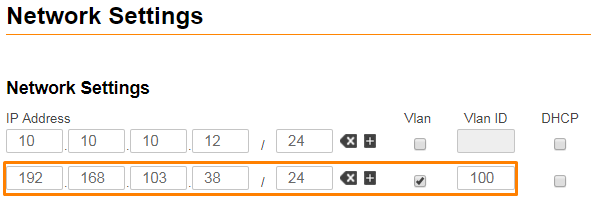
- Go to the "Network Access" → "Network Settings", add IP address and associate it with VLAN 100 (example), click the "Apply" button.
NOTE
Now, our unit has two management interfaces:
- 10.10.10.12 for untagged frame.
- 192.168.103.38 for VLAN 100.
Security considerations imply to remove management interface for untagged frames, leaving only management VLAN access operational. Such configuration do not allow to restrict any other VLAN transport except management VLAN. In order to allow switching of selected VLANs only, please proceed to the next chapters.
VLAN Creation
"Default VLAN" with "Untagged" mode for all ports is configured by default.
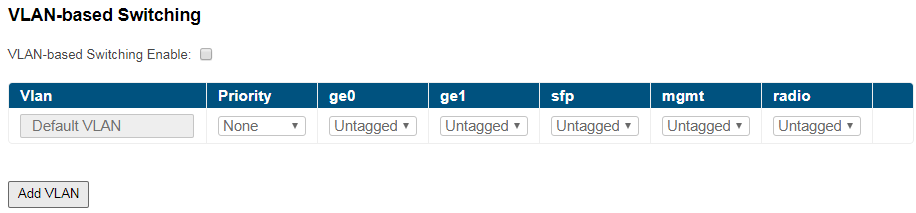
NOTE
"Default VLAN" could not be deleted.
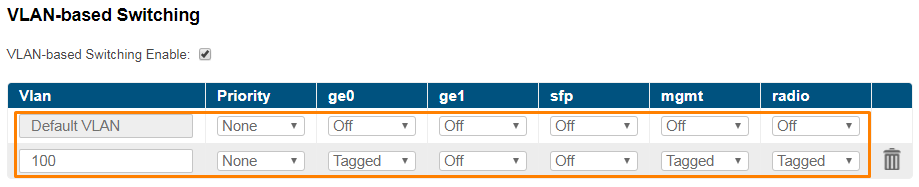
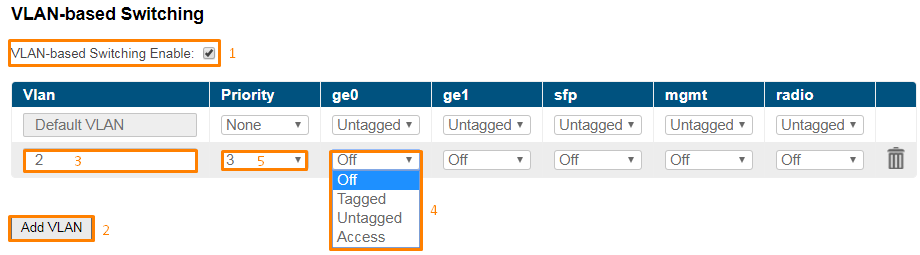
- In the section "Switch" → "VLAN-based Switching" enable VLAN-based Switching. Now only traffic based on connectivity matrix and VLAN is allowed.
- Click the “Add VLAN” button, "VLAN 2" is added by default.
- Modify the value for the VLAN tag according to the actual requirements.
- Select VLAN mode.
- Set the priority for the selected VLAN.
- In the section "Radio" → "Radio Setting" enable "Traffic Prioritization".
NOTE
VLAN modes and mapping between 802.1p priorities and 4 queues can be found in the section "Switch".
NOTE
In order to allow both tagged and untagged traffic to pass the "Untagged" mode should be configured on selected VLAN. There can be maximum one VID for each port in "Untagged" mode.
NOTE
Examples
Both tagged and untagged traffic transmission
Figure - VLAN configuration example |
VLAN for management and traffic forwardingThis document uses the following network setup:
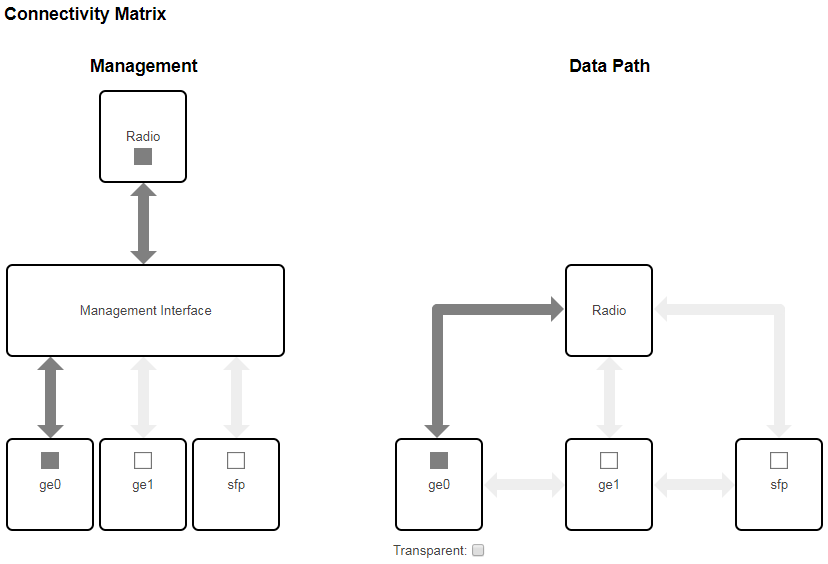
Configuration steps: Connectivity Matrix configuration
Figure - Connectivity matrix configuration Set up management
Figure - Adding a management IP address and associate it with VLAN 100 NOTE Configured IP address could not be used for management if you begin by enabling the VLAN-based switching and remove the "Untagged" mode. The access to the unit is allowed using initial IP address, in this case 10.10.10.12.
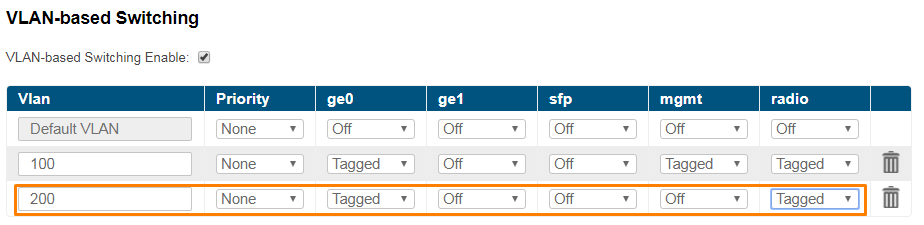
Figure - Set up management Set up traffic forwarding
Figure - Set up traffic forwarding At this point, the access to the unit is allowed using only VLAN 100 and the newly assigned IP address. Traffic tagged with VLAN 200 will be switched only between the "ge0" and the "radio" ports. Untagged traffic or tagged traffic with other VLANs besides 100 or 200 is not allowed. |
Trunk and Trunk VLANInstallation which requires VLAN tagged frames to flow in both directions through the unit wireless link, does not require any specific configuration. Just due to security reasons it is recommended to set up Management VLAN. All the rest configurartion is not needed in most cases, except the issue to deny certain VLANs. Please, use the configuration steps from chapter VLAN Management. |
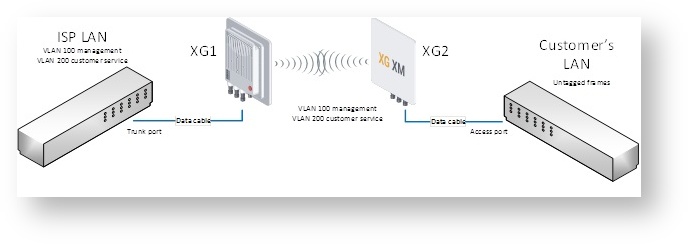
Access and Trunk VLANOne unit receives VLAN tagged frames from switch trunk port (port configured to carry frames with different VLAN tags), another unit connects with end-customer LAN with requirement to egress untagged frames from certain VLAN only.
Figure – Trunk and Acess VLAN example XG1 Configuration
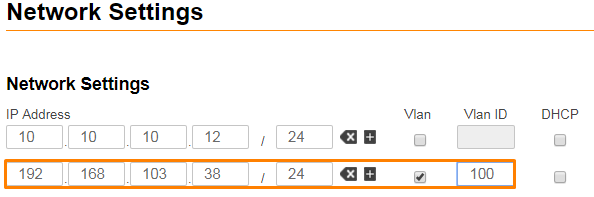
Figure - Adding a management IP address and associate it with VLAN 100
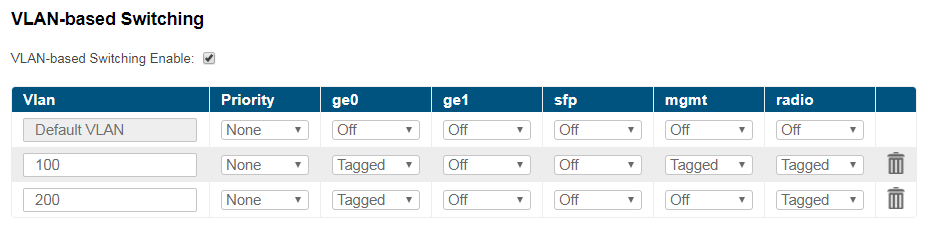
Figure - VLAN Configuration XG2 Configuration
Figure - Adding a management IP address and associate it with VLAN 100
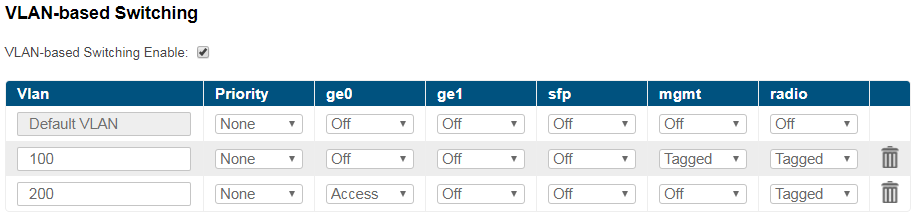
Figure - VLAN Configuration At this point, the access to the unit is allowed using only VLAN 100 and the newly assigned IP address. Traffic tagged with VLAN 200 will be received by "radio" port and switched untagged to customer’s LAN through "ge0" port. |