...
- Connect Gigabit Ethernet port at the ODU to the power supply port labeled as "OUT".
- Connect Ethernet port at the laptop to the power supply port labeled as "IN".
- Connect the power cord to power supply and plug it to AC mains.
| Center | ||||||||||
|---|---|---|---|---|---|---|---|---|---|---|
|
Step 2: Access to the device
...
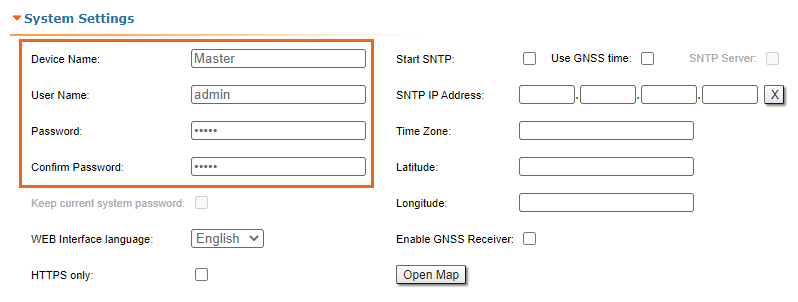
- Device Name (e.g., Master/Slave).
- User Name (e.g., admin).
- Password (e.g., admin).
| Center |
|---|
|

| Note | ||
|---|---|---|
| ||
At the next login set up login and password to access the unit in the privileged mode. |
...
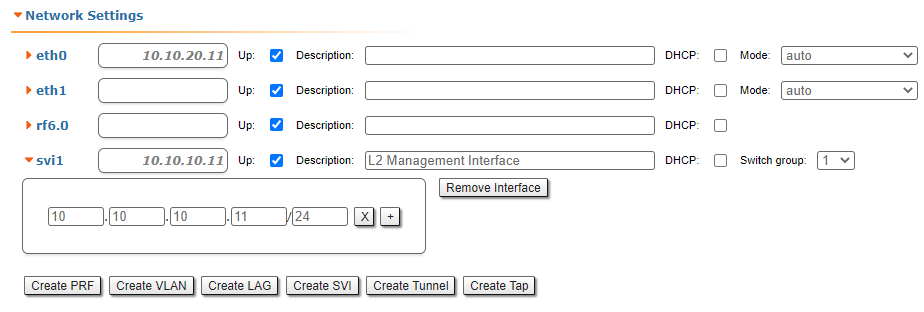
Network settings for Master:
| Center |
|---|
|

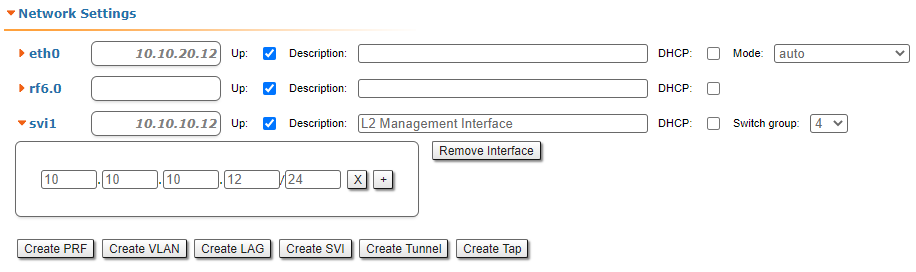
Network settings for Slave:
| Center |
|---|
|
Step 4: Software upgrade
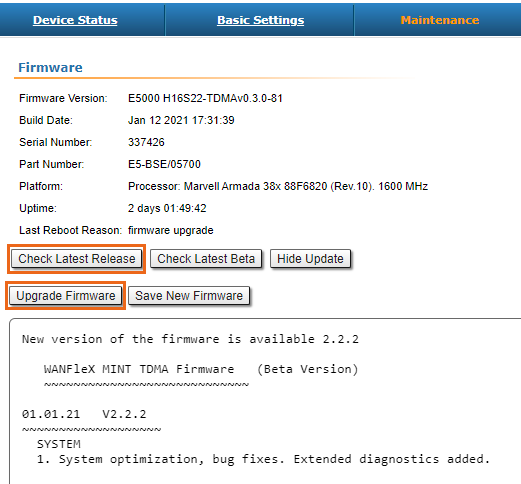
Let's upgrade each unit to the latest stable firmware version. Go to the Maintenance section and click on the "Check Latest Release" button. In case a new software version is available, click on the "Upgrade Firmware" to initiate the firmware upgrade process. Before, make sure the laptop which is connected to the unit has an Internet connection, too. Otherwise, the manual firmware upgrade process should be performed.
| Center |
|---|
|

Step 5: Radio parameters configuration
...
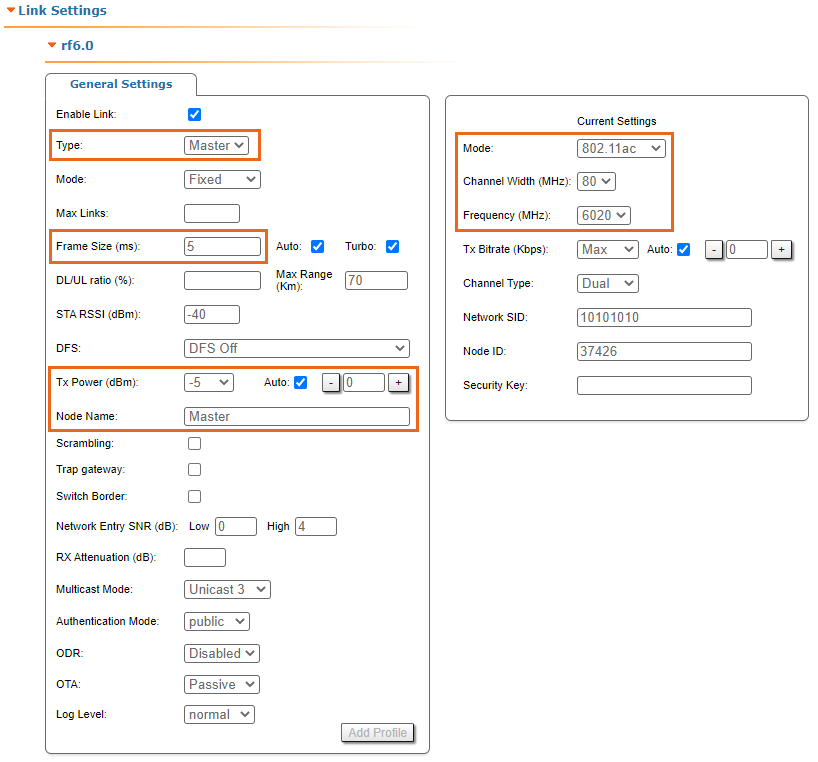
- Type: Master.
- Tx Power: e.g., -10 5 dBm (set the minimum value in the range, as currently, we are in the lab, and we don't need high output power anymore).
- Node Name: e.g., Master (it is the same as the value set at Device Name if this was saved before).
- Mode: 802.11ac (if compatibility with InfiLINK 2x2 / InfiMAN 2x2 families devices is not required).
- Channel Width: e.g., 40 80 MHz.
- Frequency: e.g., 4900 6020 MHz.
- Frame size: e.g., 5 ms.
- Greenfield: On.
The rest of parameters remain with the default values.
| Center |
|---|
|

At the unit named Slave at step #3 above, go to the Basic Settings section, then to Link Settings and set this unit with:
- Type: Slave.
- Tx Power: e.g., 5 0 dBm (set the minimum value in the range, as currently, we are in the lab, and we don't need high output power anymore).
- Node Name: e.g., Slave (it is the same as the value set at Device Name if this was saved before).
- Channel Width: e.g., 40 80 MHz.
- Frequency: e.g., 4900 6020 MHz.Greenfield: On.
The rest of parameters remain with the default values.
...