...
- Run the ERConsole.jar application downloaded from our FTP.
- Connect a network Ethernet cable between the InfiNet Wireless unit and your PC.
- Turn off the InfiNet Wireless unit and then turn it on in a few seconds
Wait for 30 seconds and the ERConsole screen should receive update from the unit as it's shown on the figure below. The Serial number, number of device reset cycles ("Sequence" field), IP address, network mask and MAC-adress will be displayed on the screen:
Center Scroll Title title Figure - ERConsole information 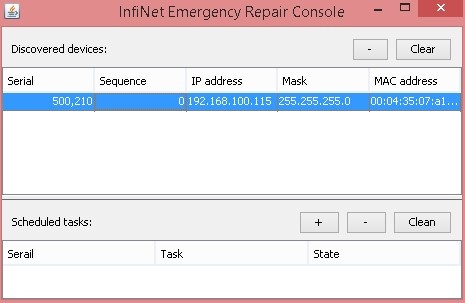
- If an IP address is assigned to the unit, configure on your laptop an IP belonging to the same network and connect to the unit in order to perform the modifications and checking required. If there is no IP displayed (0.0.0.0), proceed with the next step
- If there is more than one unit in the list, please, select the required unit.
- Click the «+» button in the ERConsole application and a new window will appear
In the New task window, set the additional IP address and network mask, then click «OK» like below:
Center Scroll Title title Figure - Adding a new IP address 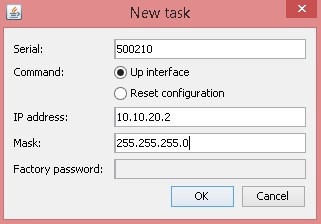
- Turn off and on the InfiNet unit. Wait for about 30 seconds until the IP is assigned
- Add an IP address from the same network subnet to your PC and access the unit. ERC will not show newly assigned IP address
- Login to the unit using the new IP. Do not reboot the unit now because the additional IP address is temporar until the next restart or the new configuration has been saved.
Restore to factory default settings using ERConsole
If you need to restore your unit to the factory default settings, follow the instructions below:
...