Usually, before going into the field, it is recommended to pre-configure in the lab the Infinet Wireless units to verify the link establishment. Therefore, let's take the units to be used for this course out of the package and place them on the table.
A minimum set of requirements must be met during devices pre-configuration in the lab:
|
The equipment list required for the lab configuration:
We will perform the settings mentioned below for each unit of the link and check if wireless link was established correctly.
Use the following instruction to assemble a test scheme:
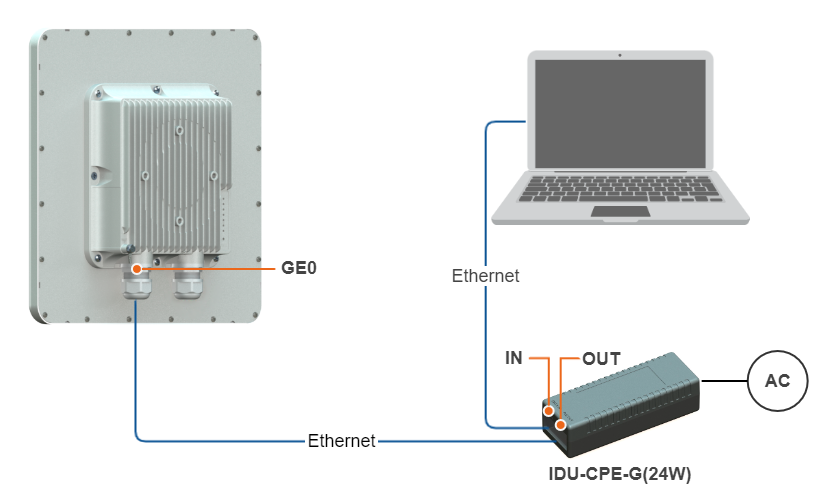
Let's access each unit to the default IP address 10.10.10.1 with mask 255.255.255.0 via a web browser. Before, make sure the Ethernet port of the Laptop has an IP address assigned from the same subnetwork as the one for the unit (e.g., set 10.10.10.10 with mask 255.255.255.0).
We assume that each unit used in this setup has not been configured before and runs with the factory settings. |
Use any letters or numbers for the initial authentication on each unit, for example:
We strongly recommend to change your login and password after the first login. |
After the first login, let's configure a distinctive name for each unit and set a custom login and password. Go to the "Settings" → "General" section and configure:
Go to the "Settings" → "Security" section and configure:
At the next login, type "admin" for the Login and Password (if these are the credentials set before) to access the unit in the privileged mode. |
Let's upgrade each unit to the latest stable firmware version. In case the laptop has an access to the Internet, a new software version will be detected automatically, update on both devices.
Otherwise, the manual firmware upgrade process should be performed:

Let's configure the minimum needed radio parameters to establish the link.
At the unit named Master at step #2 above, go to the "Settings" → "General" section and set the "Link ID" parameter, it must be the same on both sides of the link. Then to "Radio" and set this unit with:
The rest of parameters remain with the default values.

Let's apply all settings described above for each unit and go to the "Dashboard" section and check if the device status has changed to "Connected".
