| Include Page | ||||
|---|---|---|---|---|
|
| Hide_comments |
|---|
| Metadata (Metadata Plugin) | ||||
|---|---|---|---|---|
| ||||
Laboratory pre-configuration |
...
| Warning | ||
|---|---|---|
| ||
Before supplying power to the Um models an external antenna or RF terminators with 50 Ohms resistance must be connected to both N-type connectors. During laboratory testing, it is allowed to directly connect two devices with RF cables without antennas with the mandatory use of attenuators with attenuation of at least 40 dB for each polarization. Switching off/on the attenuators and RF cables should only be performed when the devices are in the off state. In case the antenna, attenuator or terminator is connected to only one N-type connector do not switch on the device. PLEASE NOTE THAT VIOLATION OF THE ABOVE REQUIREMENTS VOIDS THE WARRANTY. |
...
| Step 1 | |||||||||||||||||||||||||||||||||||||||||||||||||||
|---|---|---|---|---|---|---|---|---|---|---|---|---|---|---|---|---|---|---|---|---|---|---|---|---|---|---|---|---|---|---|---|---|---|---|---|---|---|---|---|---|---|---|---|---|---|---|---|---|---|---|---|
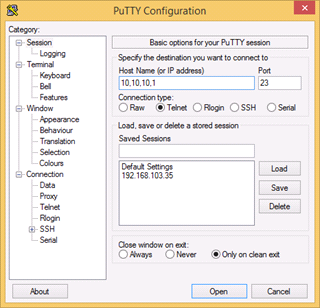
CLI is available via telnet: "cmd> telnet 10.10.10.1" or use any suitable telnet client such as Putty.
| |||||||||||||||||||||||||||||||||||||||||||||||||||
| Step 2 | |||||||||||||||||||||||||||||||||||||||||||||||||||
Use any letters or numbers for initial authentication, for example:
| |||||||||||||||||||||||||||||||||||||||||||||||||||
| Step 3 | |||||||||||||||||||||||||||||||||||||||||||||||||||
Check the firmware version and upgrade the units to the latest stable firmware version. You can check firmware version via command:
Compare current version of the unit with version on official InfiNet Infinet ftp server: ftphttps://ftp.infinet.ru/pub/Firmware/XG/H12. In case a newer version is available we recommend upgrading.
| |||||||||||||||||||||||||||||||||||||||||||||||||||
| Step 4 | |||||||||||||||||||||||||||||||||||||||||||||||||||
Configure radio parameters.
| |||||||||||||||||||||||||||||||||||||||||||||||||||
| Step 5 | |||||||||||||||||||||||||||||||||||||||||||||||||||
Save configuration.
| |||||||||||||||||||||||||||||||||||||||||||||||||||
| Step 6 | |||||||||||||||||||||||||||||||||||||||||||||||||||
Restart the unit.
| |||||||||||||||||||||||||||||||||||||||||||||||||||
| Step 7 | |||||||||||||||||||||||||||||||||||||||||||||||||||
Check the link status.
In case of success configuration:
|
...