...
The section includes two key areas:
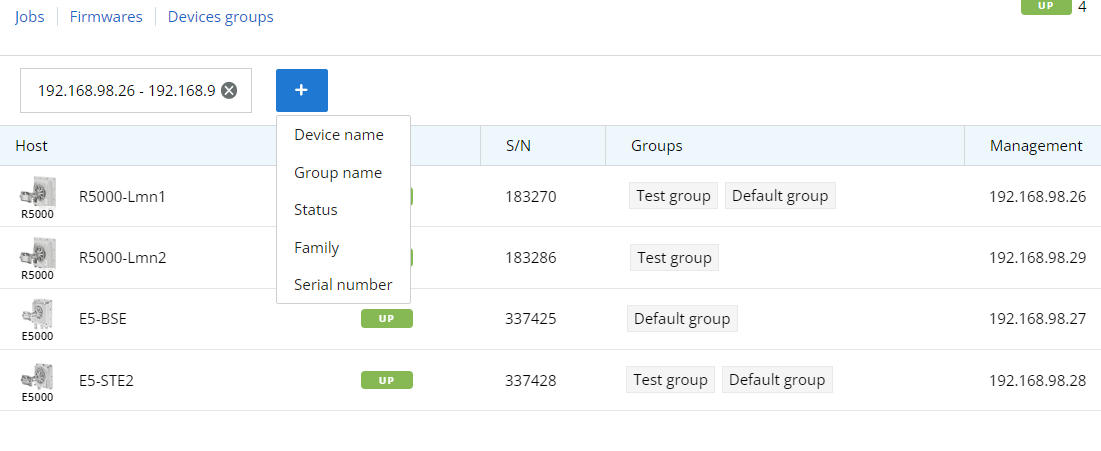
- Devices list - devices and their groups that are in the user's visibility area.
- Side area for detailed information.
...
- Device - the device name.
- Status - current device status.
- Family - family to which this device belongs.
- Serial number - unique serial number assigned to device at the production stage.
- Groups - list of groups the device belongs to.
- IP address - device's IP addresses list.
To apply a device filter, use the "Add filter" button at the top of the list and set the search parameters. The "IP-address" filter allows to search both a single address and a range of addresses (no more than 255).
| Center | |||||||
|---|---|---|---|---|---|---|---|
|
Device profile
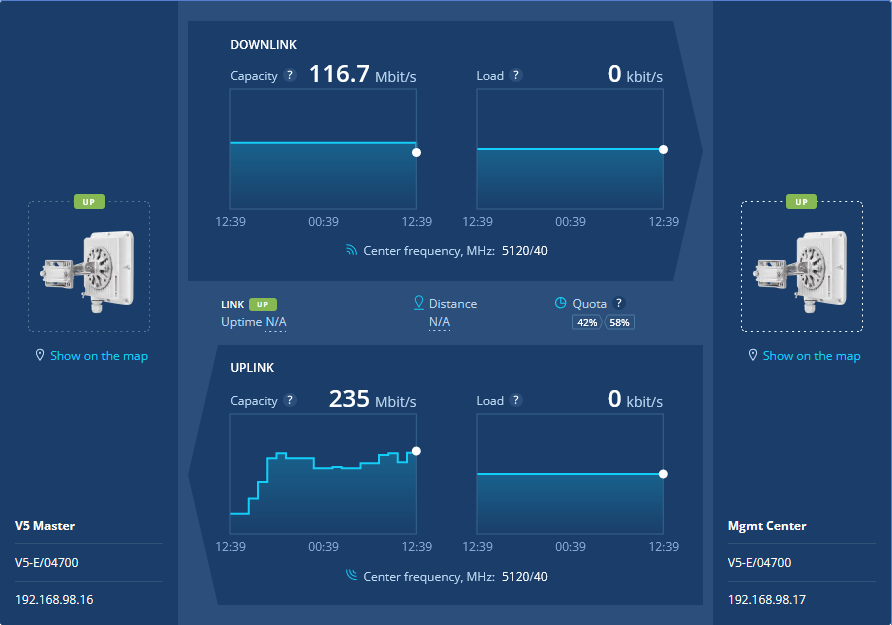
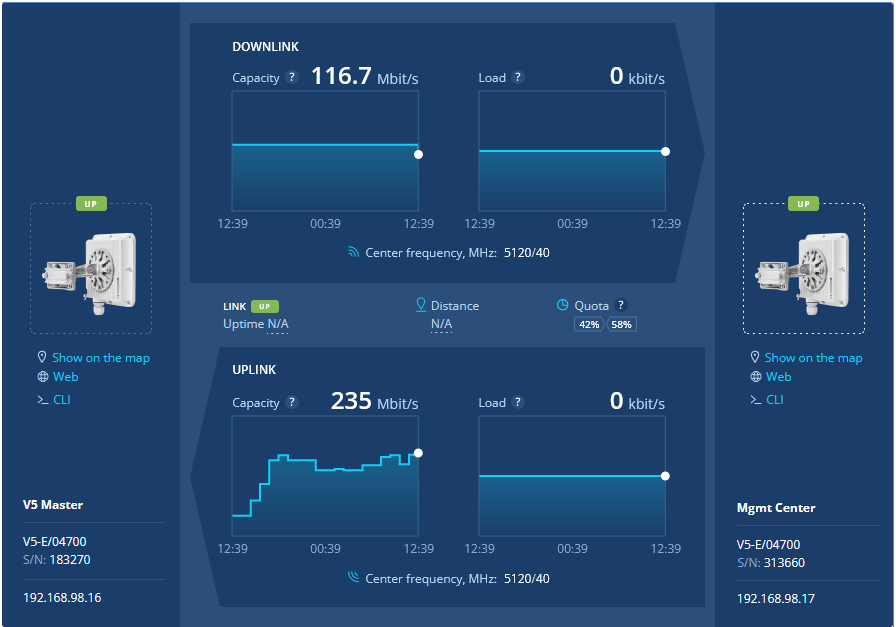
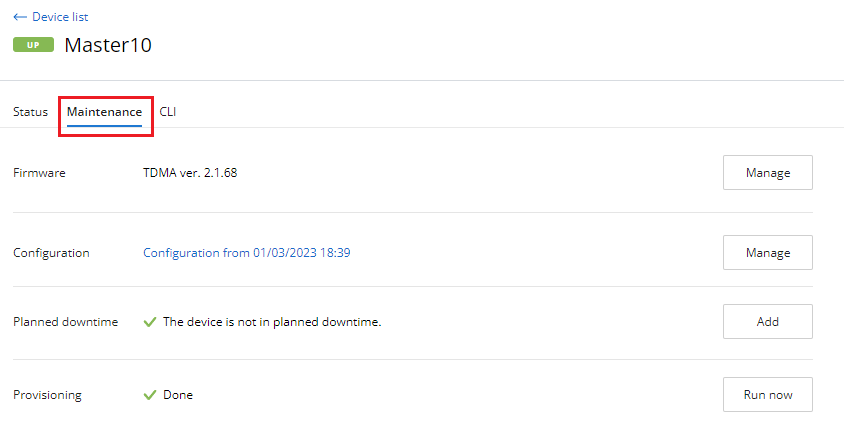
Each device is presented by its profile contains the whole information about device. There are following section in profile:
- Status - device operation parameters.
- Maintenance - management tools: firmware, configurations etc.
- CLI - device management via command line interface.
The "Status" section consists of several parts:
...
There is special section includes both the current and remote device. This section presents characteristics of wireless link in downstream and upstream. For local and remote devices, there is the ability to switch to its web interface or to manage via the command line.
| Center | |||||||
|---|---|---|---|---|---|---|---|
|
Network infrastructure requirements
...
| Center | |||||||
|---|---|---|---|---|---|---|---|
|
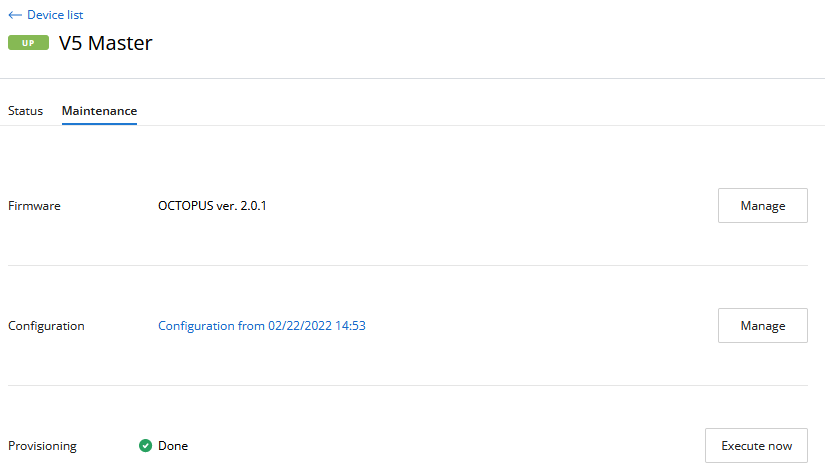
Configuration
The configuration is automatically loaded for each device added to InfiMONITOR NEXT. If the device's configuration has been changed, it will be reloaded, but the previous configuration won't be deleted. Thus, the monitoring system always stores both the current device configuration and its previous versions.
| Note | ||
|---|---|---|
| ||
Configuration and software management functions are available only for devices monitored via SNMP v3The configuration management feature is only available for devices that have been successfully provisioned. For more details proceed to the Description and operational principles section. To update devices configurations safely via the monitoring system, perform a firmware update. For InfiLINK 2x2, InfiMAN 2x2 families:
For InfiLINK XG, InfiLINK XG 1000 families:
There are no restrictions for the InfiLINK Evolution, InfiMAN Evolution, Quanta 5/6/70 families. |
To view the device configurations list, click on the "Manage" button in the "Configuration" row:
...
To highlight changes in the comparison mode, click on the "Show the difference" button.
| Center | |||||||
|---|---|---|---|---|---|---|---|
|

Configuration changing
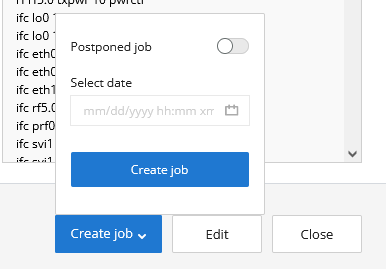
Changing the device's configuration includes the following steps:
...
- Create job at a required date and time.
- Create job for the current time.
| Note | ||
|---|---|---|
| ||
In order to perform the jobs execution at a required time, it is necessary to set date and time on the virtual machine where InfiMONITOR NEXT is installed. Time settings can not be made in the monitoring system. |
| Center | |||||||
|---|---|---|---|---|---|---|---|
|
...
Upload firmware files
To update the softwarefirmware, it must be previously uploaded into a special storage of the monitoring system. In In order to do this, go to the "Management" section and click the "SoftwareFirmware" button.
| Center | |||||
|---|---|---|---|---|---|
|

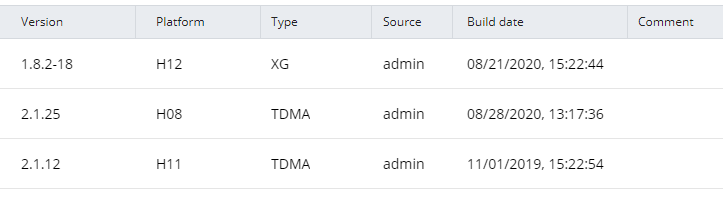
Each file in the repository has the following fields:
- Version - the software firmware version.
- Platform - the hardware platform for which the software firmware is intended. The monitoring system will allow to create an update task using only those files that are suitable for the device selected.
- Type - the software firmware type, MINT or TDMA.
- Source - firmware files can be uploaded to the repository either manually or automatically from the update center (not available at the moment). Here will be displayed the source of the file.
- Build date - date when the software firmware file was built.
- Comment - the monitoring system administrators can leave comments to each file.
| Center | |||||
|---|---|---|---|---|---|
|
...
Firmware update
The software firmware update is performed via a special update job. In In order to do this, go to the "Maintenance" section of the device card. In the "Firmware" line click the "Manage" button. This This will open a list of software firmware files suitable for this device.
| Center | |||||
|---|---|---|---|---|---|
|
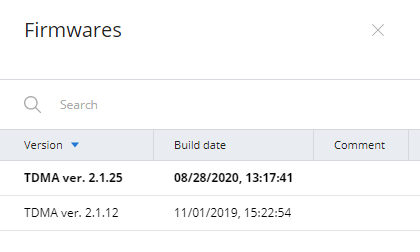
Select the software firmware version to be applied to the device, then click the "Create job" button. Same to the configuration update jobs, you can run the update immediately or schedule it for a later time.
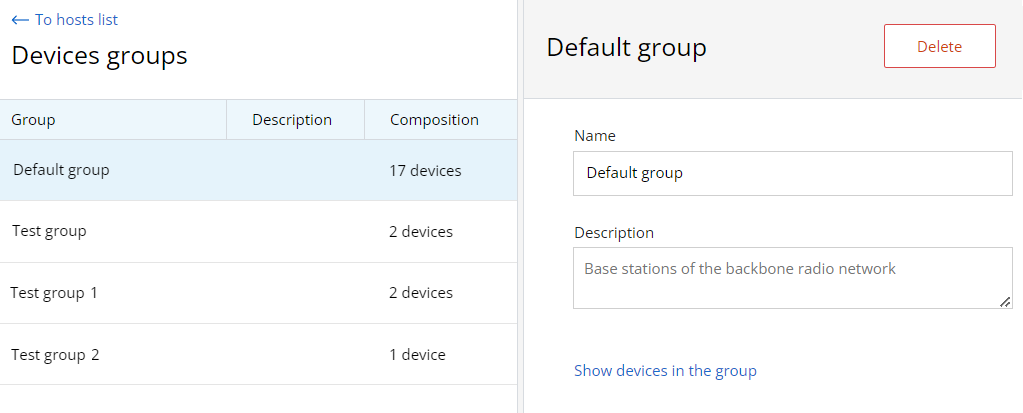
Devices groups
The devices can be joined in groups. Grouping is necessary to manage visibility areas and perform group operations such as software updates. Each device must be added to at least one group.
By default, InfiMONITOR NEXT has the following groups:
- Default group - first group necessary to start using InfiMONITOR NEXT.
- Group for automatically discovered devices - a special group where automatically added devices are placed.
To manage groups in "Device Management" section, go to the "Device Groups" subsection.
This section provides a list of all groups created in the monitoring system, to create a new group, click the "Add Group" button on the sidebar. To view devices of a particular group, select the group and click the "Show devices in group" button on the sidebar.
| Center | |||||
|---|---|---|---|---|---|
|
Command execution
The monitoring system allows to manage the device using the command line. The command line is available in the "CLI" subsection of the device status section.
| Center | |||||
|---|---|---|---|---|---|
|
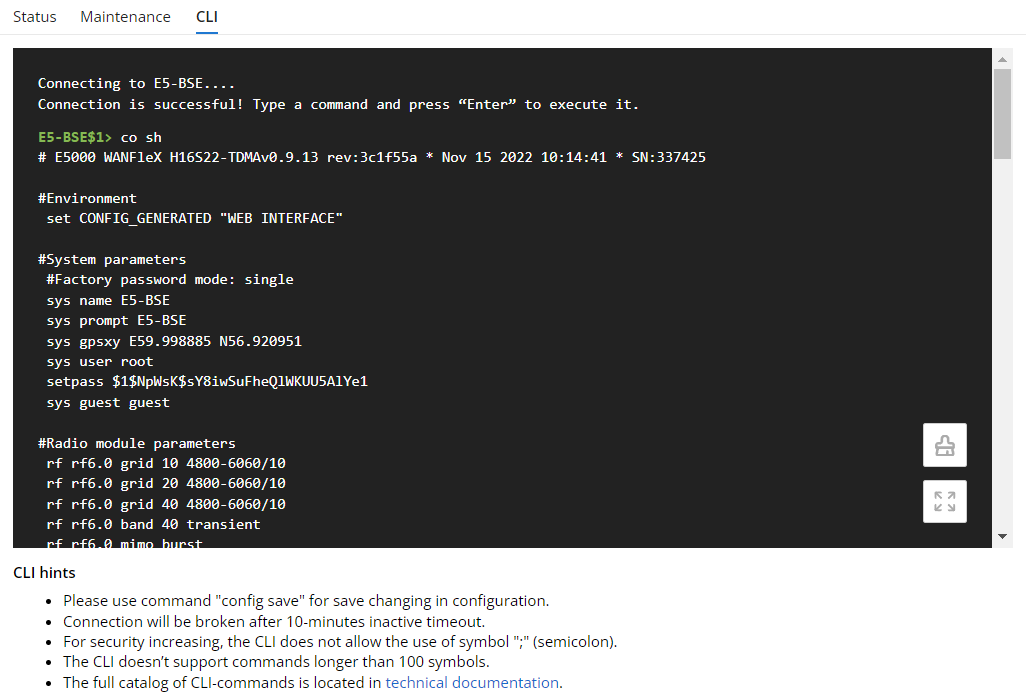
To clear the command line window, click the button.
To manage the device from the monitoring system, it must be provisioned, see System configuration - Provisioning.
A complete list of commands is available in the technical documentation:
- For InfiLINK 2x2, InfiMAN 2x2, InfiLINK Evolution, InfiMAN Evolution - WANFleX - Technical User Manual
- For InfiLINK XG, InfiLINK XG 1000 - InfiLINK XG / InfiLINK XG 1000 - CLI Commands - Technical User Manual