...
Hide_comments
| Table of Contents |
|---|
Network access
The network parameters are responsible for network access to the monitoring system. The initial values of the network parameters are determined at the monitoring system installing stage (NEXT installation).
The monitoring system allows only the one network adapter. Thus, the routing settings in the corporate network must be performed by the appropriate elements of the network infrastructure.
Network parameters are presented in the "Network" part of the "Settings" section:
- Connection method - a method for determining the network parameters values. Static - values are specified manually, DHCP - values are determined automatically using a DHCP server.
- IP address - the adapter network address.
- Network mask - the network mask.
- Default gateway - the default router IP address.
- Main DNS Server - the main DNS server IP address. To add additional addresses, click the "Add reserve DNS server" button.
Click the "Save" button to complete the configuration.
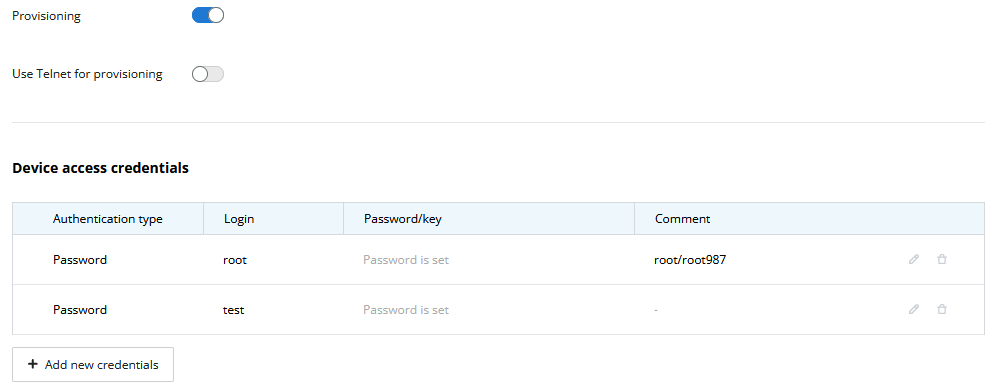
Provisioning
There are parameters controls auto provisioning function:
- Provisioning - switch activates provisioning. Please note that configuration management is available only for provisioned devices.
- Use Telnet for provisioning-activates using Telnet protocol for devices provisioning, by default SSH is using.
- Device access credentials - to do provisioning InfiMONITOR NEXT will try to connect to devices via SSH/Telnet protocols using these credentials. If several credential pairs are specified, they will be used alternately until authentication is successful.
| Center | |||||||
|---|---|---|---|---|---|---|---|
|
Connection to the email server
...
Go to the "Email" part of the "Settings" section. There are the following parameters are responsible for the monitoring system connection to a remote SMTP server:
- "Sender address" - an email address that will be set in the FROM field of emails sent to users by the monitoring system.
- "SMTP server address" - FQDN or IP address of the SMTP server.
- "SMTP server network port" - the network port used to connect to the SMTP server.
- "Use SSL" - this option must be enabled if the connection to the SMTP server is performed using the SSL protocol. In case the connection has no encryption or the TLS protocol is used, the parameter must be disabled - the monitoring system automatically determines the possibility of the TLS protocol using.
- "SMTP server login" - username for authentication on the SMTP server. Leave blank if no authentication is required.
- "SMTP server password" - password for authentication on the SMTP server. Leave blank if no authentication is required.
| Center | |||||||
|---|---|---|---|---|---|---|---|
|
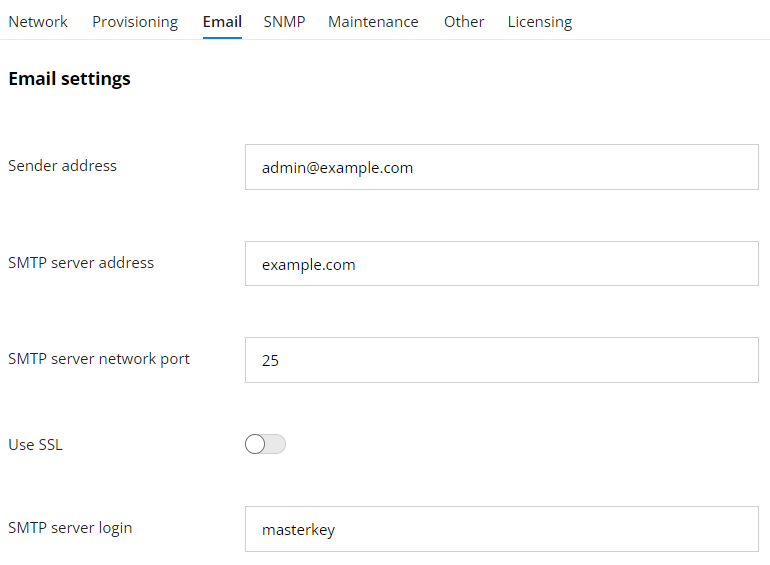
Click the "Save" button to complete the configuration.
Network parameters
The network parameters are responsible for network access to the monitoring system. The initial values of the network parameters are determined at the monitoring system installing stage (NEXT installation).
The monitoring system allows only one network adapter. Thus, the routing settings in the corporate network must be performed by the appropriate elements of the network infrastructure.
Network parameters are presented in the "Network" part of the "Settings" section:
- "Connection method" - a method for determining the network parameters values. Static - values are specified manually, DHCP - values are determined automatically using a DHCP server.
- "IP-address" - the adapter network address.
- "Network mask" - the network mask.
- "Default gateway" - the default router IP address.
- "Main DNS Server" - the main DNS server IP address. To add additional addresses, click the "Add reserve DNS server" button.
...
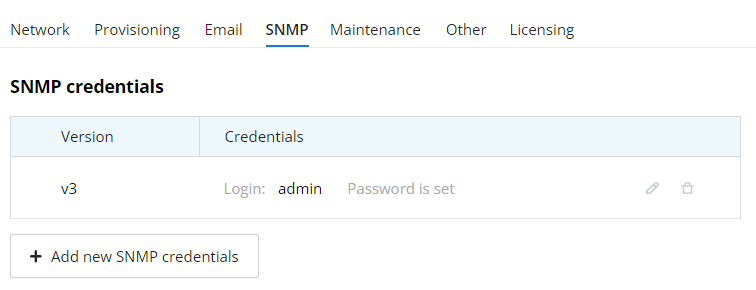
SNMP credentials
The polling of network devices is carried out via SNMP protocol. The monitoring system uses the list of SNMP credentials, which is managed in the "Settings" section. In the SNMP part of this section, the following data should be specified:
- List with the access details that are set on the wireless network devices.
- The network ports list which are set for the SNMP server operation on the wireless devices.
| Center | |||||||
|---|---|---|---|---|---|---|---|
|
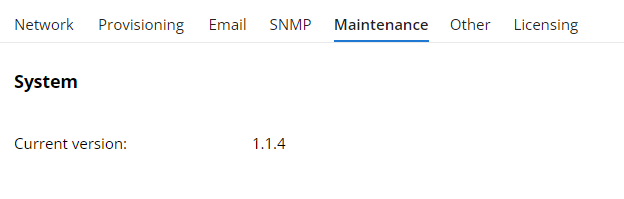
Maintenance
The "System" section of the "Maintenance" tab displays the current version of the monitoring system.
| Center | |||||||
|---|---|---|---|---|---|---|---|
|
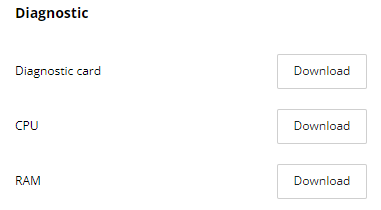
The monitoring system has the following diagnostic tools located in the corresponding section of the “Maintenance” tab:
- "Diagnostic card" is a text file containing information about the installed NEXT monitoring system, license and operating status of its subsystems. The file generation may take about 30 seconds.
- "CPU" - a set of files with information about CPU load by NEXT subsystems. The file generation may take about 30 seconds.
- "RAM" - a set of files with information about RAM load by NEXT subsystems. The file generation may take about 30 seconds.
These files must be generated and attached to the request when contacting technical support.
| Center | |||||||
|---|---|---|---|---|---|---|---|
|
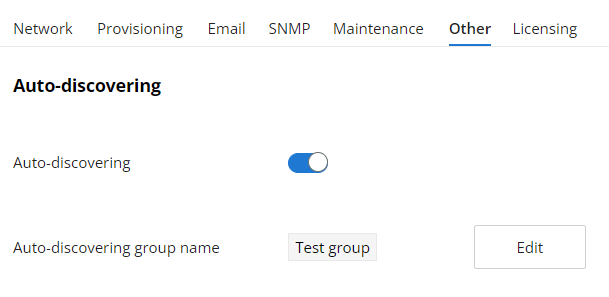
Auto discovering
Auto discovering mode is enabled by default in InfiMONITOR NEXT. You can configure it in the "Settings" → "Other" section, there are the following options available:
- Auto-discovering - enable or disable the automatic discovery mode.
- Auto-discovering group name - name of the special group which is used by default for automatically discovered devices.
| Center | |||||||
|---|---|---|---|---|---|---|---|
|
Licensing
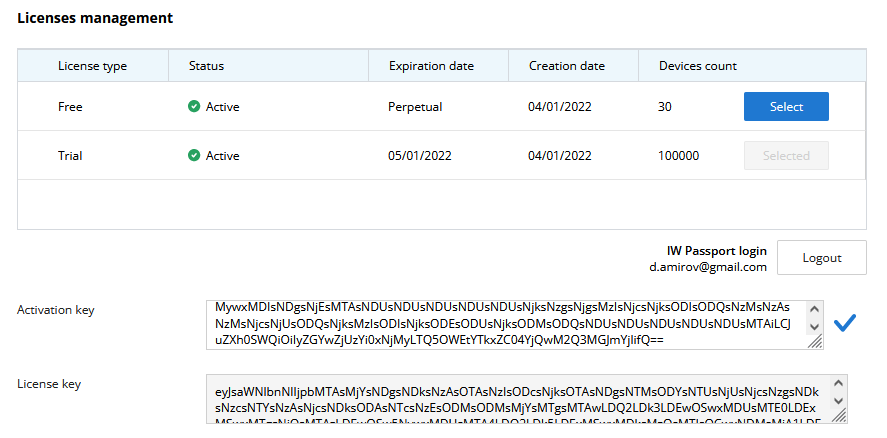
In the "Settings" → "Licensing" section you may install new license or get details about the current one.
License management
| Note | ||
|---|---|---|
| ||
In order to apply the license, the user's PC must have an access to the Internet. The NEXT server access to the Internet is not required. |
Operation with licenses are performed in Infinet Wireless Licensing Center, please click on the "Go to CA" button. You should use your IW Passport account to authorize in the licensing center. Please be careful because requested licenses will be issued to the organization and person specified in your user profile.
In the licensing center you can create Free and Trial licenses yourself, Free type licenses can be created in any number.
In order to add a previously purchased Enterprise license to the CL, contact the Infinet Wireless technical support Service Desk, specifying following information:
- An account in IW Passport for which a Free type license was generated at the initial setupstage. Without generating a license of the Free type, activation of an Enterprise license is not possible.
- Company name.
- Number of devices.
After receiving a message from the technical support about the license activation, go to the Licensing section and perform the following steps:
- Copy the activation key from the NEXT monitoring system.
- Go to the personal account of the licensing center and select the desired license.
- Paste the copied activation key into the appropriate field.
- Click the button to generate a license key.
- Copy the generated license key.
- Return to the licensing settings of the NEXT system and paste the license key in the appropriate field.
- Press the "Apply" button.
| Center | |||||||
|---|---|---|---|---|---|---|---|
|
In order to transfer an Enterprise license to another server with a monitoring system, contact the Infinet Wireless technical support, specifying following information:
- An account in IW Passport for which an Enterprise license were generated.
- Company name.
- Number of devices.