CAUTION
The installation process and system requirements described below will change in future NEXT beta versions.
System requirements
NEXT is distributed as an OVA virtual machine image for deployment under the control of a hypervisor. The following hypervisors are currently supported: VMware ESXi.
NOTE
VMware doesn't support "PCnet-FAST III (Am79C970)", "PCNet PCI II (Am79C970A)" network cards.
The recommended system requirements for the platform, depending on the number of network nodes that are planned to be monitored using NEXT are in the table below.
| Network nodes | up to 1000 | up to 5 000 | up to 10 000 |
|---|---|---|---|
| CPU | Level of Intel Core i3 3.6 GHz, 4 cores. | Level of Intel Core i5 3 GHz, 6 cores. | Level of Intel Xeon E 2.4 GHz, 10 cores. |
| RAM | up to 4 Gb | up to 8 Gb | up to 16 Gb |
| HDD | up to 200 Gb | up to 1 Tb | up to 2 Tb |
| Additional | RAID 10 |
CAUTION
The processor used must have an x64 architecture.
Pre-installation
Requirements for NEXT deployment:
- A virtualization server controlled by hypervisor compatible with NEXT.
- OVA image (Open Virtualization Format) with last NEXT version, downloaded from official Infinet Wireless FTP server - ftp://ftp.infinet.ru/pub/INMS/.
Installation
NOTE
In this installation example VMware ESXi hypervisor is used. For deploying to a different hypervisor, proceed to the user guide for this product.
Step 1 - import OVA image
- Launch vSphere Client and connect to a hypervisor.
- Run the image import wizard "File → Deploy OVF Template".
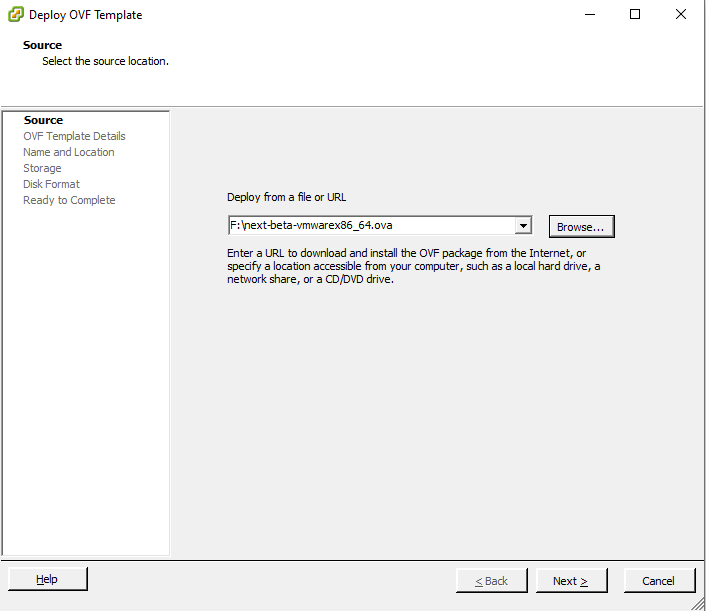
At the first step of wizard click the "Browse" button and and specify the path to the NEXT image file. Click "Next" button to proceed to the following step.
The next step contains general information about the image, click the "Next" button.
Specify a custom virtual machine name, such as "NEXT EMS." Click "Next" button to continue.

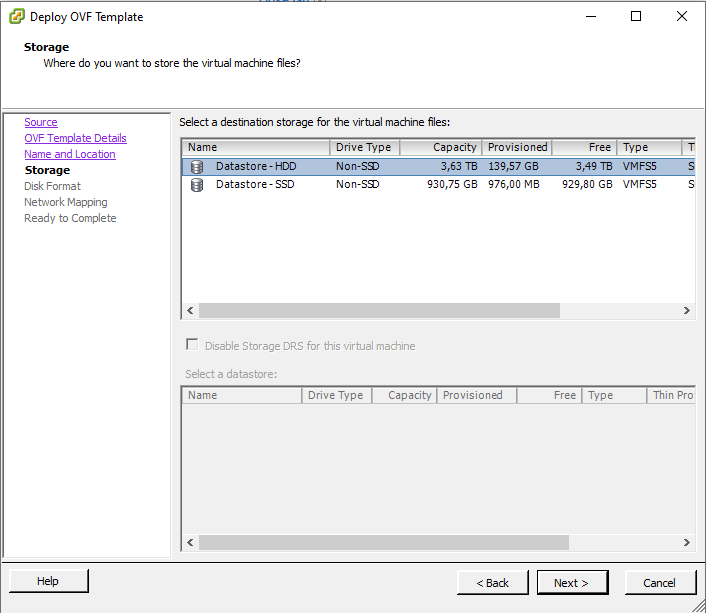
Select the hypervisor storage where the virtual machine should be created. The storage should have the free space amount corresponding to system requirements.
Click "Next" button to continue.
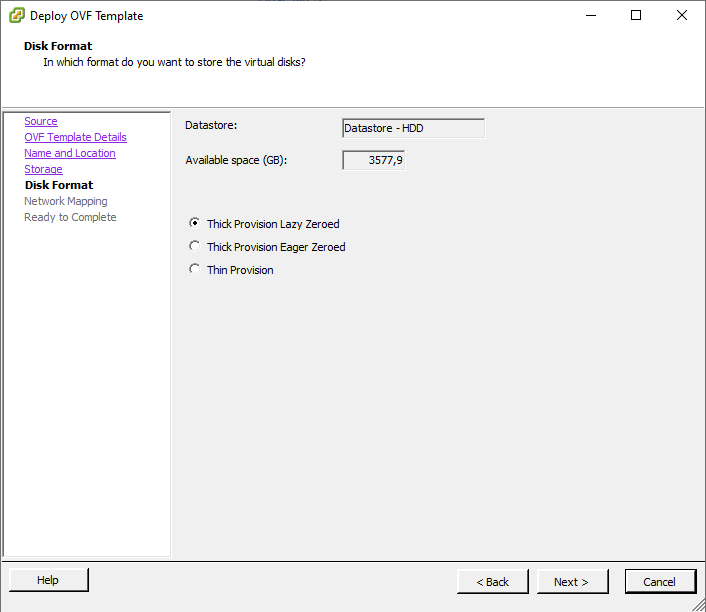
At the next step specify the formatting requirements for the space allocated in the repository. Keep the default settings and click "Next" to continue.
Let's configure the network connection of the virtual machine to the local network. It depends on the hypervisor configuration and the local network topology. The selection of network connection is determined by the following requirements:
- the monitoring system must have network access to wireless devices;
- wireless network administrators must have access to the web interface of the monitoring system;
- to make updates, the monitoring system must have access to the update server located on the Internet;
- for the correct function of notification subsystem the monitoring system must have network access to the corresponding email server.
Click "Next" button to continue.

At the final step, summary information about the parameters of the created virtual machine is displayed. Check it and return to the appropriate steps to make adjustments, if necessary.
Set the "Power on after deployment" flag to automatically start the virtual machine after it is created.
If all the parameters are correct, click the "Finish" button to complete the image import and create a virtual machine with the NEXT monitoring system.

Now the virtual machine is created. Run it manually if you have not choose to start the virtual machine automatically in the previous step.
Step 2 - NEXT pre-configuration
NOTE
In the first beta version, only network settings are available for configuration. In the future, the list of adjustable parameters will expand.
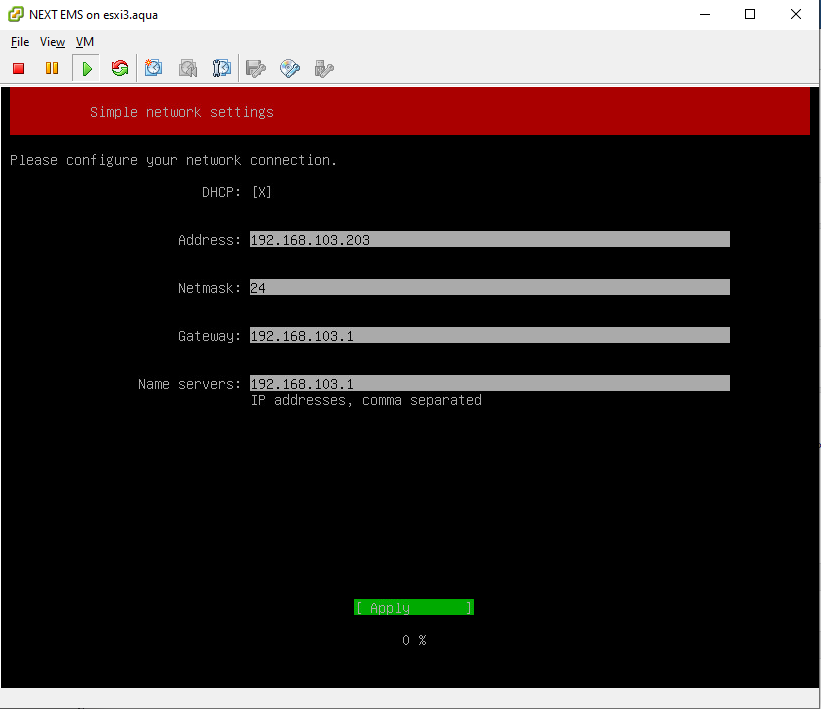
Open the virtual machine console. After NEXT loading, a service mode will be launched, in which the basic parameters necessary to start the monitoring system are available.
The most important are the network connection settings. By default, NEXT attempts to obtain network settings via DHCP. To set static values, disable DHCP and manually specify the following parameters values:
- IP address and network mask of the monitoring system network interface;
- Default gateway IP address;
- DNS server IP address.
Click the "Apply" button after setting all parameters.
The preliminary configuration is completed, now you can connect to the NEXT monitoring system web interface.